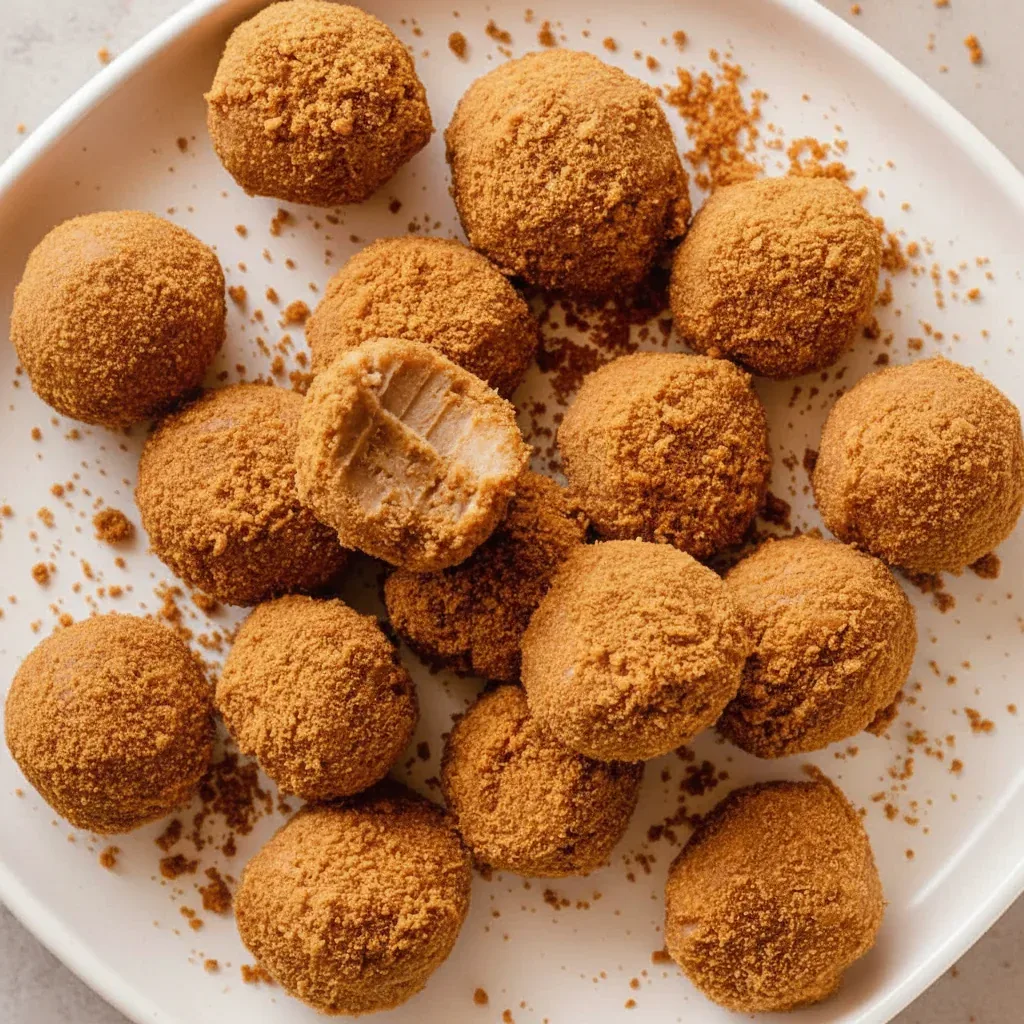
Easy 4-Ingredient Biscoff Truffles – A No-Bake Treat

The Ultimate No-Bake Biscoff Truffles Recipe
Have you ever delved into a jar of Biscoff spread and wondered if its spiced, caramelised perfection could be elevated even further? We certainly have. That distinctive, comforting flavour is a true delight. We’re thrilled to share that you can transform this beloved spread into elegant, bite-sized morsels of joy. Allow us to guide you with our foolproof recipe for the most luxurious Biscoff Truffles you will ever have the pleasure of tasting.
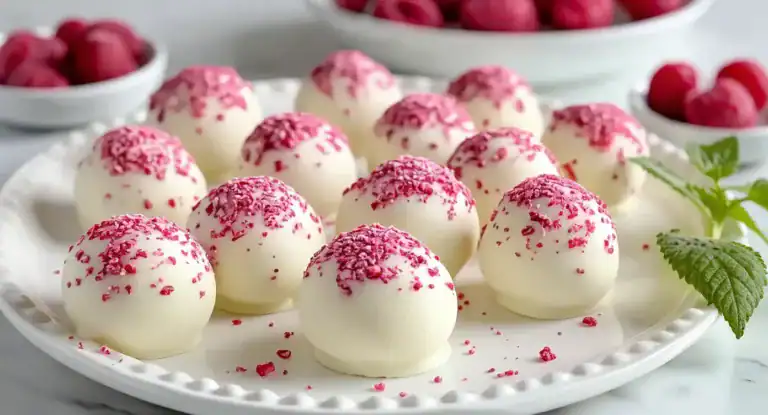
These little creations are simply wonderful. They bring together the satisfying crunch of Lotus biscuits, the velvety smoothness of Biscoff spread, and the subtle tang of cream cheese, all enrobed in a crisp chocolate coating. They serve as the ideal make-ahead dessert for gatherings, a charming homemade gift, or a rewarding treat waiting for you in the fridge. If you enjoy crafting simple yet stunning confectionery, you might also adore our White Chocolate Raspberry Truffles Recipe.
Put away your baking tins; this is a straightforward, no-fuss method that yields an exceptionally decadent result. Let’s head to the kitchen and make a little magic.
Why You’ll Love This Recipe
- Effortlessly Simple to Prepare: With just a handful of easy steps and no need for an oven, these are the quintessential no-bake truffles. A mixing bowl and some patience for chilling are all that’s required.
- Intense Biscoff Flavour: We incorporate both Biscoff biscuits and the spread itself, guaranteeing that every mouthful is saturated with that signature spiced caramel profile. It’s a genuine homage to this spectacular ingredient.
- Wonderfully Rich and Creamy: The inclusion of cream cheese cuts through the sweetness, lending a sumptuously smooth, melt-in-the-mouth consistency that feels truly indulgent.
- Perfect for Gifting: Presented in a little box tied with a ribbon, these homemade truffles are not only beautiful but also make a thoughtful and delicious present for any occasion.
- Endlessly Adaptable: Feel free to coat them in your favourite chocolate—be it white, milk, or dark—and finish with any toppings you desire. We’ve included some of our top suggestions below!
Ingredients
- Lotus Biscoff Biscuits
- Smooth Lotus Biscoff Spread
- Full-Fat Cream Cheese
- Icing Sugar
- Vanilla Extract
- White Chocolate
- Dark or Milk Chocolate
- Coconut Oil or Vegetable Oil
- Crushed Biscoff biscuits
- Melted Biscoff spread
How to Make Biscoff Truffles: A Step-by-Step Guide
Crafting these magnificent truffles is a delightfully simple affair. We have outlined the process in clear, easy-to-follow steps to ensure you achieve perfect results. Let’s get started!
-
Step 1: Prepare the Biscoff Crumb
First, we need to transform the Lotus Biscoff biscuits into a fine powder. A food processor is perfect for this—simply blitz them until they have a sandy texture. If you don’t own a food processor, there’s no need to worry! Just place the biscuits into a sealable bag and crush them using a rolling pin. It’s surprisingly therapeutic! Remember to set aside a couple of tablespoons of the crumbs for decorating later on.
-
Step 2: Combine the Truffle Filling
In a large bowl, place the softened cream cheese, smooth Biscoff spread, sifted icing sugar, vanilla extract, and a small pinch of salt. Using an electric mixer, beat these ingredients together on a medium speed until they are fully incorporated, smooth, and have a creamy consistency. Be sure to scrape down the sides of the bowl to catch any stray bits. Next, gently fold in the main portion of your Biscoff crumbs, mixing just until they are evenly distributed.
-
Step 3: Chill the Mixture
This stage is vital for ensuring the truffle mixture is easy to work with. Cover the bowl with cling film and pop it into the fridge for at least one to two hours, or for a quicker option, place it in the freezer for 30-40 minutes. You’re looking for the mixture to be firm enough to roll into balls without sticking to your hands.
-
Step 4: Roll and Chill Again
Once the mixture is suitably firm, it’s time to form the truffles. Line a baking sheet or a large plate with baking parchment. Use a small cookie scoop or a tablespoon to measure out even portions of the mixture. Roll each portion between your palms to create neat, 1-inch balls and arrange them on your prepared tray. When all the mixture has been rolled, return the tray to the freezer for a further 20-30 minutes. This extra chill makes the truffles very cold, which helps the chocolate coating to set almost instantly.
-
Step 5: Melt the Chocolate and Coat
As the truffles undergo their final chill, we can prepare the chocolate shell. Place your chosen chocolate and the coconut oil into a microwave-safe bowl. Heat in 30-second bursts, stirring thoroughly after each interval, until the chocolate is glossy and completely melted. Take care not to let it get too hot.
Retrieve the truffles from the freezer. Working with one at a time, drop a truffle into the melted chocolate. Use two forks to gently roll it until it is completely covered, then lift it out, allowing the excess chocolate to drip away. Carefully place the coated truffle back onto the parchment-lined sheet.
-
Step 6: Decorate and Set
Now for the finishing touches! Before the chocolate has a chance to fully set, adorn your Lotus Biscoff candy with a sprinkle of the reserved biscuit crumbs. For an extra flourish, you could also add a drizzle of melted Biscoff spread. You’ll need to work quite swiftly, as the coldness of the truffles will cause the chocolate to harden very quickly. Once all your truffles are coated and decorated, place them in the fridge for a final 15 minutes to set completely.
Our Top Tips for Perfect Cookie Butter Truffles
To ensure your Biscoff Truffles are nothing short of spectacular, we have compiled a few of our most valuable tips and tricks.
- The Importance of Chilling: We really can’t overstate this! Chilling the mixture before rolling, and then chilling the rolled balls before dipping, is the key to a smooth and frustration-free experience. A firm, cold truffle is far simpler to coat in warm, melted chocolate.
- Use Softened Cream Cheese: For a silky, lump-free filling, it’s essential that your cream cheese is at room temperature. We recommend taking it out of the fridge about an hour before you plan to begin.
- A Cookie Scoop is a Game-Changer: Employing a small cookie scoop allows you to create truffles of a uniform size, both quickly and with minimal mess.
- Achieve the Perfect Coating: Adding a small amount of coconut oil or vegetable oil to your melting chocolate results in a thinner, glossier coating that is much easier to manage.
- Work in Small Batches: If your kitchen tends to be on the warmer side, we suggest keeping half of the rolled truffles in the freezer while you dip the first batch. This prevents them from becoming too soft to handle.
Delicious Variations to Try
Although this classic recipe is a guaranteed hit, it also serves as a wonderful canvas for your culinary creativity. Here’s your chance to personalise this speculoos dessert!
- A Trio of Chocolate: Can’t decide on one type of chocolate? Use all three! Dip some truffles in white, others in milk, and the rest in dark chocolate to create a stunning, varied selection.
- A Touch of Salty Contrast: For an irresistible sweet-and-salty flavour profile, sprinkle a few flakes of sea salt over the truffles immediately after coating them in chocolate.
- Add a Nutty Crunch: Stir finely chopped pecans, walnuts, or hazelnuts into the truffle filling to introduce an extra layer of texture and taste.
- A Boozy Twist: For a version strictly for the grown-ups, incorporate a tablespoon of coffee liqueur or spiced rum into the cream cheese mixture for a sophisticated kick.
If you consider yourself a true Biscoff enthusiast and are keen to discover more uses for this delightful spread, then you must give our Biscoff Rice Krispie Treats a try. They provide a uniquely chewy and crunchy experience!
Storing Your Homemade Truffles
As these truffles are made with cream cheese, they must be stored in the refrigerator. Keep them in an airtight container, and they will remain fresh for up to a week—though we suspect they won’t be around for that long!
For longer-term storage, they also freeze beautifully. Arrange the finished truffles in a single layer inside a freezer-safe container, using baking parchment to separate any layers. They can be kept frozen for up to three months. Just allow them to thaw in the fridge for about an hour before serving.
FAQ
The Perfect Treat for Any Occasion
And there you have it—a simple yet elegant recipe for creamy, delectable cookie butter truffles that is sure to wow your friends and family. This recipe is proof that you don’t need to spend hours at the stove to produce something truly special. The marriage of rich, spiced Biscoff and smooth chocolate is a flavour combination that is simply divine.
We truly hope you enjoy making (and of course, eating!) these Biscoff Truffles as much as we do. They have become a firm favourite in our kitchen, and we are so pleased to be able to share the recipe with you. All that’s left to do is open that jar of Biscoff and start mixing!
We would love to see how yours turn out. If you give this recipe a go, please do leave a comment below to let us know. Happy truffle-making!
Recipe Card
Ingredients
- 250g Lotus Biscoff Biscuits, finely crushed
- 225g Full-Fat Cream Cheese, softened
- 125g Smooth Lotus Biscoff Spread
- 60g Icing Sugar, sifted
- 1 tsp Vanilla Extract
- Pinch of salt
- 300g White, Milk, or Dark Chocolate, for coating
- 1 tsp Coconut Oil or Vegetable Oil (optional)
- For Garnish: 2 tbsp reserved biscuit crumbs and melted Biscoff spread
Instructions
- Prepare Crumbs: In a food processor or a sealed bag with a rolling pin, crush the Biscoff biscuits into fine crumbs. Set aside 2 tablespoons for decoration.
- Make Filling: In a large bowl, use an electric mixer to beat the softened cream cheese, Biscoff spread, sifted icing sugar, vanilla extract, and salt until smooth and creamy. Fold in the larger portion of biscuit crumbs until just combined.
- Chill: Cover the bowl and chill the mixture in the fridge for 1-2 hours or in the freezer for 30-40 minutes, until firm enough to handle.
- Roll & Chill Again: Line a tray with parchment paper. Roll the chilled mixture into 1-inch balls and place them on the tray. Freeze for another 20-30 minutes until very firm.
- Coat with Chocolate: Melt the chocolate and coconut oil in the microwave in 30-second intervals, stirring until smooth. Working one at a time, dip each frozen truffle into the chocolate, using two forks to coat it completely. Allow excess chocolate to drip off.
- Decorate and Set: Place the coated truffle back on the parchment paper. Immediately sprinkle with the reserved biscuit crumbs and drizzle with melted Biscoff spread before the chocolate hardens. Refrigerate for a final 15 minutes to set completely.
Calories: 191,
Carbs: 20g,
Protein: 2g,
Fat: 11g