Bloomin Onions Recipe Crispy Party Indulgence

There are few appetisers that command attention quite like a golden, perfectly crisp onion, blooming on the plate like a magnificent edible flower. We are, of course, talking about the iconic Bloomin’ Onion. For a long time, this show-stopping starter has been a highlight on restaurant menus, often seeming like a complex feat of culinary skill best left to the professionals. But what if we told you that you could master this brilliant creation in your own kitchen? We have perfected the ultimate Bloomin Onions Recipe, a detailed guide that will take you through each stage to achieve that wonderfully crunchy coating and the soft, sweet onion inside. This recipe is your new secret weapon for turning any ordinary evening into a special occasion. Prepare to elevate a simple onion into the most impressive snack you’ve ever served.
This is more than just a recipe for a fried onion; it’s about crafting an unforgettable experience. The entire process is a joy, from making the careful incisions that form the ‘petals’ to the triumphant moment you lift the golden-brown creation from the hot oil. It’s a true delight for the senses: the satisfying crunch of the batter, the wonderful aroma filling your kitchen, and, of course, the incredible taste. We’ve developed a classic, creamy dipping sauce with a tangy kick that perfectly cuts through the richness and enhances the onion’s natural sweetness. This is the ideal shareable snack, designed to bring everyone together around the table to pull off one delicious petal after another. It’s comforting, theatrical, and utterly delicious.
Why You’ll Love This Recipe
- A Flavour Explosion: The delightful contrast between the sweet, tender onion and the savoury, seasoned batter is simply sensational. Every single petal is a perfect mouthful, and when paired with our zesty dip, it becomes a truly addictive snack.
- Looks Spectacular, but is Surprisingly Simple: Although it appears to be a culinary masterpiece, our clear, step-by-step instructions make the process remarkably easy to follow. It’s the ideal “wow-factor” dish for impressing your guests with a fantastic recipe.
- Made with Kitchen Staples: You won’t need to hunt for special ingredients. This recipe relies on simple, everyday items such as flour, spices, and an onion, which you probably already have at home.
- The Perfect Dish for Sharing: This is the ultimate centrepiece for communal eating. It’s brilliant for gatherings, game nights, or cosy family evenings, making it an appetizer designed for everyone to dig in and enjoy together.
Ingredients
- 1 very large sweet onion (like a Spanish or Vidalia variety), about 450-500g
- 1.5 litres vegetable or rapeseed oil, for frying
- For the Spiced Coating:
- 250g plain flour
- 4 teaspoons paprika
- 2 teaspoons garlic powder
- 1/2 teaspoon cayenne pepper
- 2 teaspoons fine sea salt
- 1/2 teaspoon freshly ground black pepper
- For the Wet Batter:
- 240ml whole milk
- 1 large free-range egg
- For the Zesty Dipping Sauce:
- 150g full-fat mayonnaise
- 2 tablespoons ketchup
- 2 teaspoons prepared horseradish sauce
- 1/2 teaspoon garlic powder
- 1/2 teaspoon paprika
- A pinch of cayenne pepper
- A pinch of salt and black pepper
Instructions
- Prepare the Dipping Sauce: We find it’s best to begin with the sauce, allowing the flavours to mingle and develop. In a small bowl, whisk together the mayonnaise, ketchup, horseradish, garlic powder, paprika, cayenne, salt, and pepper until completely smooth. Cover and pop it in the fridge to chill whilst you get the onion ready.
- Prep the Onion: Take your large sweet onion and slice approximately half an inch from the top (the pointed end). Peel off the dry, papery outer layers, making sure to leave the root end completely untouched. The root is what cleverly holds all the petals together, so it’s vital not to trim it.
- Create the ‘Bloom’ Cut: Place the onion with the flat, cut-side down onto a chopping board. With a large, sharp knife, make a downward slice about half an inch away from the root, cutting all the way down to the board. Turn the onion by 90 degrees and repeat the cut to form four equal sections. Continue to make slices between these quarters until you have 12-16 evenly spaced wedges, always remembering not to cut through the root base.
- Open Up the Petals: Carefully flip the onion over. Using your fingertips, gently pry the sections apart to encourage the “flower” to open. Be delicate to prevent the petals from breaking off. For an extra flourish, you can submerge the onion in cold water for about 10 minutes to help it open even more, but ensure it is patted completely dry afterwards with kitchen paper.
- Set Up the Coating Stations: You will need two wide, shallow bowls. In the first bowl, whisk all the ingredients for the spiced coating: the plain flour, paprika, garlic powder, cayenne, salt, and pepper. In the second bowl, beat the milk and egg together until smooth to form your wet batter.
- First Dry Coating: Place the cut onion into your spiced flour mixture. Use a spoon to liberally sprinkle the flour all over, ensuring you get it right down between each and every petal. This initial dry layer is crucial for helping the wet batter to adhere properly. Once it’s fully coated, give it a gentle shake to remove any excess flour.
- Wet and Final Dry Coating: Now, carefully dip the floured onion into the wet batter. Spoon the mixture over it, tilting the bowl to make sure every nook and cranny is covered. Lift it out, let the excess batter drip away for a second, and then place it straight back into the spiced flour for its final coating. Be generous once more, spooning the flour all over. This double-coating method is our secret to a perfectly crispy finish.
- Heat the Frying Oil: Pour the vegetable oil into a large, deep, heavy-based pan or a deep-fat fryer, ensuring it’s at least 3 inches deep. Heat the oil over a medium-high heat until it reaches 175°C (350°F). We recommend using a thermometer for an accurate reading. If the oil isn’t hot enough, the onion will become greasy; too hot, and the coating will burn before the onion is cooked through.
- Fry to Golden Perfection: Using a large slotted spoon or a spider strainer, very gently lower the coated onion into the hot oil, cut-side down. Take great care as the oil might bubble up. Fry for 3-4 minutes on this side until the bottom is a rich golden brown. Carefully flip the onion over and fry for a further 3-4 minutes until the entire onion is beautifully golden, crispy, and the inside is perfectly tender.
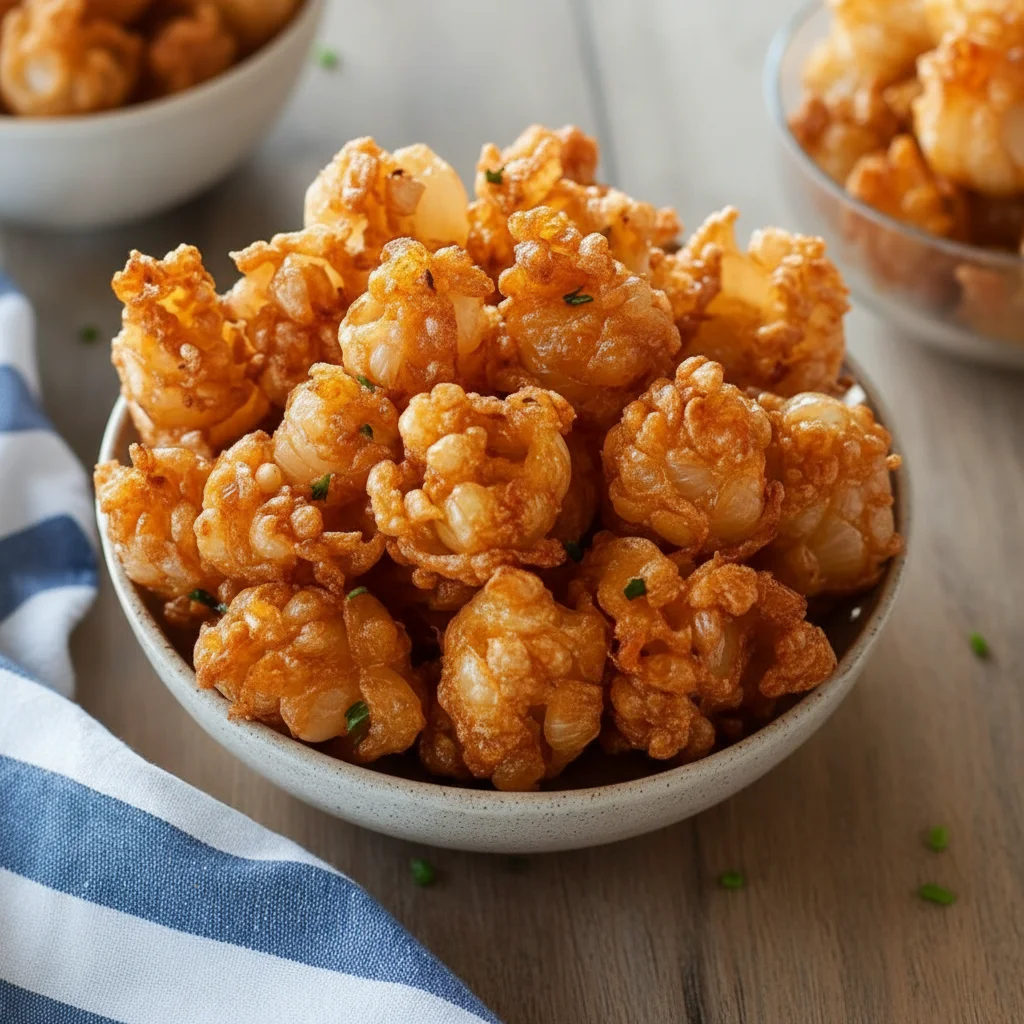
- Drain and Serve: Once cooked, remove the onion from the oil with your slotted spoon and place it onto a wire rack. This allows any excess oil to drain away, keeping it wonderfully crisp. Season with a touch more salt if desired. To serve, place your magnificent bloomin onions on a platter. You can use a small knife to carefully remove the very centre, creating a neat well for your dipping sauce, or just serve the sauce in a small bowl alongside. Enjoy immediately while it’s hot and at its crispiest!
Frequently Asked Questions
And there you have it—our ultimate guide to creating the perfect homemade Bloomin’ Onion. With its show-stopping appearance and unbelievably good flavour, this is a recipe that’s guaranteed to be a huge success. It’s the ideal centrepiece for a fun, relaxed meal with your favourite people. For a truly epic party food spread, we love to serve this alongside our brilliant Bacon Brown Sugar Chicken Tenders. If you’ve still got room for dessert, why not follow this savoury star with a sweet finale like our wonderful Peach Crumb Cheesecake? We are so excited for you to give this recipe a go. Please do leave a comment below to let us know how your fantastic creation turns out!
Recipe Card
Ingredients
- 1 very large sweet onion (like a Spanish or Vidalia variety), about 450-500g
- 1.5 litres vegetable or rapeseed oil, for frying
- For the Spiced Coating:
- 250g plain flour
- 4 teaspoons paprika
- 2 teaspoons garlic powder
- 1/2 teaspoon cayenne pepper
- 2 teaspoons fine sea salt
- 1/2 teaspoon freshly ground black pepper
- For the Wet Batter:
- 240ml whole milk
- 1 large free-range egg
- For the Zesty Dipping Sauce:
- 150g full-fat mayonnaise
- 2 tablespoons ketchup
- 2 teaspoons prepared horseradish sauce
- 1/2 teaspoon garlic powder
- 1/2 teaspoon paprika
- A pinch of cayenne pepper
- A pinch of salt and black pepper
Instructions
- Prepare the Dipping Sauce: We find it’s best to begin with the sauce, allowing the flavours to mingle and develop. In a small bowl, whisk together the mayonnaise, ketchup, horseradish, garlic powder, paprika, cayenne, salt, and pepper until completely smooth. Cover and pop it in the fridge to chill whilst you get the onion ready.
- Prep the Onion: Take your large sweet onion and slice approximately half an inch from the top (the pointed end). Peel off the dry, papery outer layers, making sure to leave the root end completely untouched. The root is what cleverly holds all the petals together, so it’s vital not to trim it.
- Create the ‘Bloom’ Cut: Place the onion with the flat, cut-side down onto a chopping board. With a large, sharp knife, make a downward slice about half an inch away from the root, cutting all the way down to the board. Turn the onion by 90 degrees and repeat the cut to form four equal sections. Continue to make slices between these quarters until you have 12-16 evenly spaced wedges, always remembering not to cut through the root base.
- Open Up the Petals: Carefully flip the onion over. Using your fingertips, gently pry the sections apart to encourage the “flower” to open. Be delicate to prevent the petals from breaking off. For an extra flourish, you can submerge the onion in cold water for about 10 minutes to help it open even more, but ensure it is patted completely dry afterwards with kitchen paper.
- Set Up the Coating Stations: You will need two wide, shallow bowls. In the first bowl, whisk all the ingredients for the spiced coating: the plain flour, paprika, garlic powder, cayenne, salt, and pepper. In the second bowl, beat the milk and egg together until smooth to form your wet batter.
- First Dry Coating: Place the cut onion into your spiced flour mixture. Use a spoon to liberally sprinkle the flour all over, ensuring you get it right down between each and every petal. This initial dry layer is crucial for helping the wet batter to adhere properly. Once it’s fully coated, give it a gentle shake to remove any excess flour.
- Wet and Final Dry Coating: Now, carefully dip the floured onion into the wet batter. Spoon the mixture over it, tilting the bowl to make sure every nook and cranny is covered. Lift it out, let the excess batter drip away for a second, and then place it straight back into the spiced flour for its final coating. Be generous once more, spooning the flour all over. This double-coating method is our secret to a perfectly crispy finish.
- Heat the Frying Oil: Pour the vegetable oil into a large, deep, heavy-based pan or a deep-fat fryer, ensuring it’s at least 3 inches deep. Heat the oil over a medium-high heat until it reaches 175°C (350°F). We recommend using a thermometer for an accurate reading. If the oil isn’t hot enough, the onion will become greasy; too hot, and the coating will burn before the onion is cooked through.
- Fry to Golden Perfection: Using a large slotted spoon or a spider strainer, very gently lower the coated onion into the hot oil, cut-side down. Take great care as the oil might bubble up. Fry for 3-4 minutes on this side until the bottom is a rich golden brown. Carefully flip the onion over and fry for a further 3-4 minutes until the entire onion is beautifully golden, crispy, and the inside is perfectly tender.
- Drain and Serve: Once cooked, remove the onion from the oil with your slotted spoon and place it onto a wire rack. This allows any excess oil to drain away, keeping it wonderfully crisp. Season with a touch more salt if desired. To serve, place your magnificent bloomin onions on a platter. You can use a small knife to carefully remove the very centre, creating a neat well for your dipping sauce, or just serve the sauce in a small bowl alongside. Enjoy immediately while it’s hot and at its crispiest!