Festive Christmas Tree Cake Truffles
There’s a certain magic in the air as Christmas approaches, a feeling I love to capture in my kitchen. The scent of baking, the glimmer of edible glitter, it all adds to the festive spirit. For me, these Christmas Tree Cake Truffles are the epitome of that feeling. They combine the nostalgic comfort of a classic sponge cake with the rich indulgence of a chocolate truffle, all wrapped up in a delightfully whimsical package. This is my go-to recipe when I need a beautiful, handmade treat for a festive get-together or a thoughtful gift for friends and neighbours.
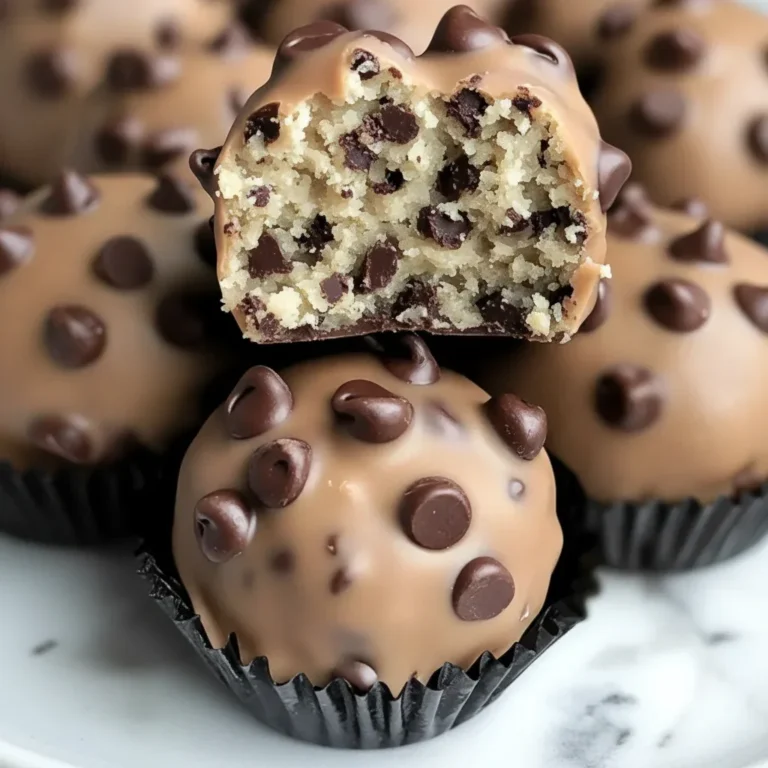
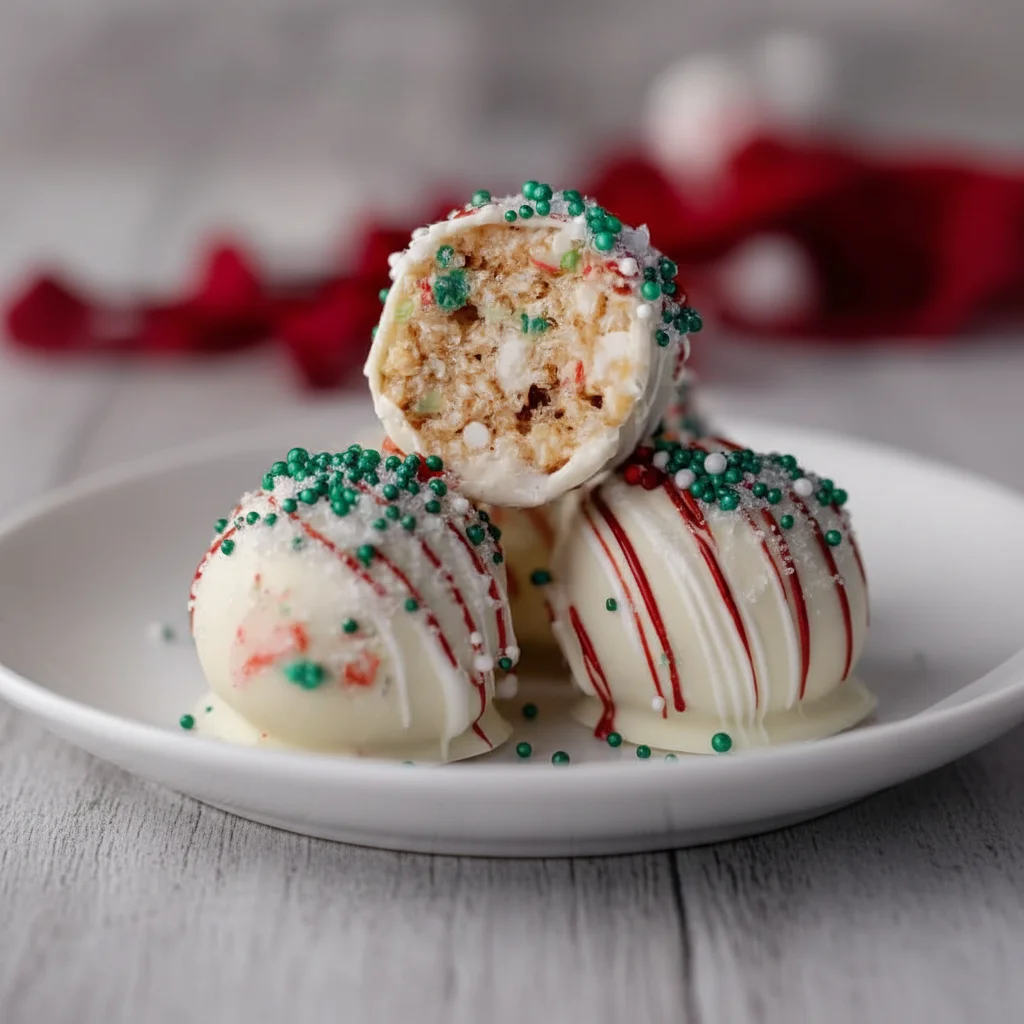
What I adore about these little Christmas tree cakes is their charming, slightly imperfect, homemade look. Each one is unique, a tiny edible work of art. The process is wonderfully tactile, from crumbling the cake to rolling the truffle mixture and finally, the fun part – dipping and decorating. The smooth, crisp candy coating gives way to a soft, moist, and deeply flavourful cake centre. The vanilla from the cake, the slight tang from the cream cheese frosting, and the sweetness of the white chocolate coating all work in perfect harmony.
These Christmas Truffles are ideal for making with children – my nephews absolutely love helping with the sprinkles! They are a fantastic addition to any holiday dessert table, work beautifully packaged as edible gifts, and are a lovely treat to have with a cup of tea after a long day of Christmas shopping. Everyone seems to love them, and they always disappear from the plate first.
Recipe Overview
These Christmas Tree Cake Truffles are a delightful confection made from crumbled vanilla sponge cake mixed with a creamy frosting, formed into cone shapes, and coated in green candy melts. The result is a moist, flavourful cake truffle with a sweet, crisp shell. I’ve found that giving them a final 10-minute chill in the freezer just before dipping makes the coating set much faster and smoother.
- Prep Time: 45 minutes
- Chill Time: 1 hour 30 minutes
- Total Time: 2 hours 15 minutes
- Servings: 24 truffles
- Difficulty: Medium
Why You’ll Love These Christmas Tree Cake Truffles
- Wonderful Texture and Taste: You get a satisfying snap from the candy shell, followed by a soft, tender cake filling that is sweet but not overpowering. The hint of cream cheese in the frosting adds a lovely depth.
- A Fun Festive Project: From mixing to decorating, this is a wonderfully engaging recipe. The entire active process comes together in under an hour, with the rest of the time dedicated to chilling.
- Completely Customisable: You can use any flavour of cake you like! A rich chocolate cake creates a lovely contrast with the green coating, or try a red velvet for an extra festive surprise inside.
- Ideal for Gifting: These little tree cakes look so professional when packed into a small box with a ribbon. They make a thoughtful, homemade gift for teachers, colleagues, and friends during the holidays.
- Family Tested: My whole family gets involved in making these each year. The kids handle the sprinkles, and my husband has become the official taster. They always get rave reviews at our annual Christmas Eve party.

Ingredients You’ll Need
For the cake base, you can use a shop-bought vanilla sponge or bake your own. If you’re baking one, make sure it’s completely cool before you start. For the candy melts, I always opt for a good quality brand like Wilton, as I find they melt more smoothly and give a more vibrant colour.
- 500g cooked and cooled vanilla sponge cake
- 120g full-fat cream cheese, at room temperature
- 60g unsalted butter, softened
- 200g icing sugar, sifted
- 1 tsp vanilla extract
- 400g green candy melts
- 1 tbsp vegetable oil or coconut oil (optional, to thin the melts)
- Assorted Christmas sprinkles and edible glitter
- 24 small pretzel sticks or chocolate sticks (for the ‘trunks’)
- Yellow star sprinkles (for the top)
Sophia’s Tip: Don’t be tempted to use low-fat cream cheese. The full-fat version provides the necessary richness and structure to bind the cake crumbs together perfectly, ensuring your truffles hold their shape.
How to Make Christmas Tree Cake Truffles
The process is straightforward. We’ll start by making our ‘cake dough’, then shaping, chilling, and finally dipping and decorating. The chilling steps are essential, so don’t be tempted to skip them!
- Prepare the Cake Crumbs: Crumble your cooled vanilla sponge cake into a large bowl. You can do this with your hands or by pulsing it a few times in a food processor until you have fine crumbs. Ensure there are no large lumps remaining.
- Make the Frosting Binder: In a separate bowl, using a stand mixer or an electric hand mixer, beat the softened butter and room temperature cream cheese together until smooth and creamy, about 2-3 minutes. Gradually beat in the sifted icing sugar until well combined, then mix in the vanilla extract.
- Combine Cake and Frosting: Add about three-quarters of the frosting to the cake crumbs. Mix it in with a spatula or your hands until the mixture comes together and holds its shape when squeezed. It should have a consistency similar to play-doh. Add more frosting if it seems too dry, but be careful not to make it too wet.
- Shape the Trees: Line a baking tray with parchment paper. Take about 2 tablespoons of the cake mixture and roll it into a ball, then gently shape it into a cone. Place the cone on the prepared baking tray. Repeat with the remaining mixture to make approximately 24 trees.
- First Chill: Place the baking tray with the shaped trees into the refrigerator to chill for at least 1 hour, or in the freezer for 30 minutes. They need to be very firm before dipping. I find the freezer works best when I’m short on time.
- Melt the Coating: Just before the chilling time is up, melt the green candy melts in a microwave-safe bowl. Heat in 30-second intervals, stirring well between each, until smooth. If the mixture is too thick, stir in 1 tablespoon of vegetable or coconut oil to thin it out for easier dipping. A deep, narrow glass or mug is ideal for this.
- Dip the Trees: Remove the chilled cake cones from the freezer. Working one at a time, dip a cone into the melted candy, using a fork to lift it out and gently tapping the fork on the side of the bowl to allow excess coating to drip off.
- Decorate and Set: Place the coated truffle back on the parchment-lined tray. Immediately, before the coating sets, add your sprinkles and place a yellow star sprinkle on top. Once you’ve dipped a few, carefully insert a small pretzel stick into the base of each tree to create the trunk.
- Final Set: Let the Christmas Tree Cake Truffles set completely at room temperature for about 30 minutes, or speed up the process by placing them in the fridge for 10-15 minutes until the coating is hard.
Tips From My Kitchen
- Temperature Control is Key: The contrast between the cold truffle and the warm melted candy is what creates a perfect, smooth coating. If your truffles are too warm, they might fall apart in the candy. If your candy is too hot, it will melt the truffles. Aim for warm, not hot, candy.
- The Secret to a Smooth Coat: I learned that adding a little bit of coconut oil or vegetable shortening to the candy melts not only thins the coating for easier dipping but also gives the final shell a lovely sheen. You can find more tips on working with chocolate coatings on sites like BBC Good Food.
- Make-Ahead Magic: You can make the uncoated cake truffle cones up to 2 days in advance. Just keep them well-covered in the refrigerator. You can even freeze them for up to a month. Then, just thaw them in the fridge before dipping and decorating.
- Storage: Store your finished Christmas Tree Cake Truffles in an airtight container in the refrigerator for up to one week. The coating protects the cake inside, keeping it moist. Let them sit at room temperature for 15 minutes before serving for the best texture.
Equipment You’ll Need
- Stand mixer or electric hand mixer
- Large baking tray
- Parchment paper
- Microwave-safe bowl or mug for melting
- Fork or dipping tools
Common Mistakes to Avoid
- Making the Mixture Too Wet: Adding too much frosting will result in greasy, overly soft truffles that won’t hold their cone shape. Start with three-quarters of the frosting and add more only if the cake crumbs are still dry and won’t stick together.
- Overheating the Candy Melts: Candy melts can seize and become lumpy if they get too hot. Always melt them gently in short bursts in the microwave, stirring thoroughly each time. If they do seize, unfortunately, there’s no way to rescue them.
- Skipping the Chilling Time: This is the most crucial step! Firm, cold truffles are essential for a clean dipping process. If they are at room temperature, they will likely crumble and fall apart in the warm candy coating.
Delicious Variations to Try
While the classic vanilla is lovely, this recipe is a fantastic base for experimentation. If you love truffles, you might also enjoy my recipes for rich Peanut Butter Truffles or decadent Biscoff Truffles.
- Chocolate Peppermint Trees: Use a chocolate sponge cake and add 1/2 teaspoon of peppermint extract to the frosting. Decorate with crushed candy canes instead of sprinkles.
- Red Velvet Surprise: Make the truffles using a red velvet cake for a stunning colour contrast when you bite into them. A cream cheese frosting works perfectly here.
- Gingerbread Spice Trees: Use a gingerbread or spice cake as your base. The warm, spiced flavour is wonderfully festive and pairs beautifully with the sweet white chocolate coating.
What to Serve With Christmas Tree Cake Truffles
These are a standalone treat, but they shine as part of a larger festive spread. They are a great sweet bite to finish a celebratory meal that might feature my Cheeseburger Lasagna Recipe.
- Hot Drinks: Serve them alongside a mug of creamy hot chocolate, a spiced latte, or even a glass of mulled wine for the adults.
- Dessert Platter: Arrange them on a platter with other festive biscuits, such as shortbread, gingerbread men, and a bowl of fresh berries.
–Ice Cream: A single truffle served next to a scoop of good quality vanilla bean ice cream makes for a simple yet elegant dessert.
Frequently Asked Questions
Christmas Tree Cake Truffles
Ingredients
Method
- Prepare the Cake Crumbs: Crumble your cooled vanilla sponge cake into a large bowl. You can do this with your hands or by pulsing it a few times in a food processor until you have fine crumbs. Ensure there are no large lumps remaining.
- Make the Frosting Binder: In a separate bowl, using a stand mixer or an electric hand mixer, beat the softened butter and room temperature cream cheese together until smooth and creamy, about 2-3 minutes. Gradually beat in the sifted icing sugar until well combined, then mix in the vanilla extract.
- Combine Cake and Frosting: Add about three-quarters of the frosting to the cake crumbs. Mix it in with a spatula or your hands until the mixture comes together and holds its shape when squeezed. It should have a consistency similar to play-doh. Add more frosting if it seems too dry, but be careful not to make it too wet.
- Shape the Trees: Line a baking tray with parchment paper. Take about 2 tablespoons of the cake mixture and roll it into a ball, then gently shape it into a cone. Place the cone on the prepared baking tray. Repeat with the remaining mixture to make approximately 24 trees.
- First Chill: Place the baking tray with the shaped trees into the refrigerator to chill for at least 1 hour, or in the freezer for 30 minutes. They need to be very firm before dipping. I find the freezer works best when I'm short on time.
- Melt the Coating: Just before the chilling time is up, melt the green candy melts in a microwave-safe bowl. Heat in 30-second intervals, stirring well between each, until smooth. If the mixture is too thick, stir in 1 tablespoon of vegetable or coconut oil to thin it out for easier dipping. A deep, narrow glass or mug is ideal for this.
- Dip the Trees: Remove the chilled cake cones from the freezer. Working one at a time, dip a cone into the melted candy, using a fork to lift it out and gently tapping the fork on the side of the bowl to allow excess coating to drip off.
- Decorate and Set: Place the coated truffle back on the parchment-lined tray. Immediately, before the coating sets, add your sprinkles and place a yellow star sprinkle on top. Once you've dipped a few, carefully insert a small pretzel stick into the base of each tree to create the trunk.
- Final Set: Let the Christmas Tree Cake Truffles set completely at room temperature for about 30 minutes, or speed up the process by placing them in the fridge for 10-15 minutes until the coating is hard.
Notes
I really hope you have as much fun making these Christmas Tree Cake Truffles as my family and I do. They are such a joyful and delicious way to celebrate the season. There’s nothing better than sharing a handmade treat with the people you love. If you try this recipe, please let me know how they turned out in the comments below – I’d love to hear from you!
Happy Baking,
Sophia Martinez