Glazed Chicken Recipe | Sticky Sweet
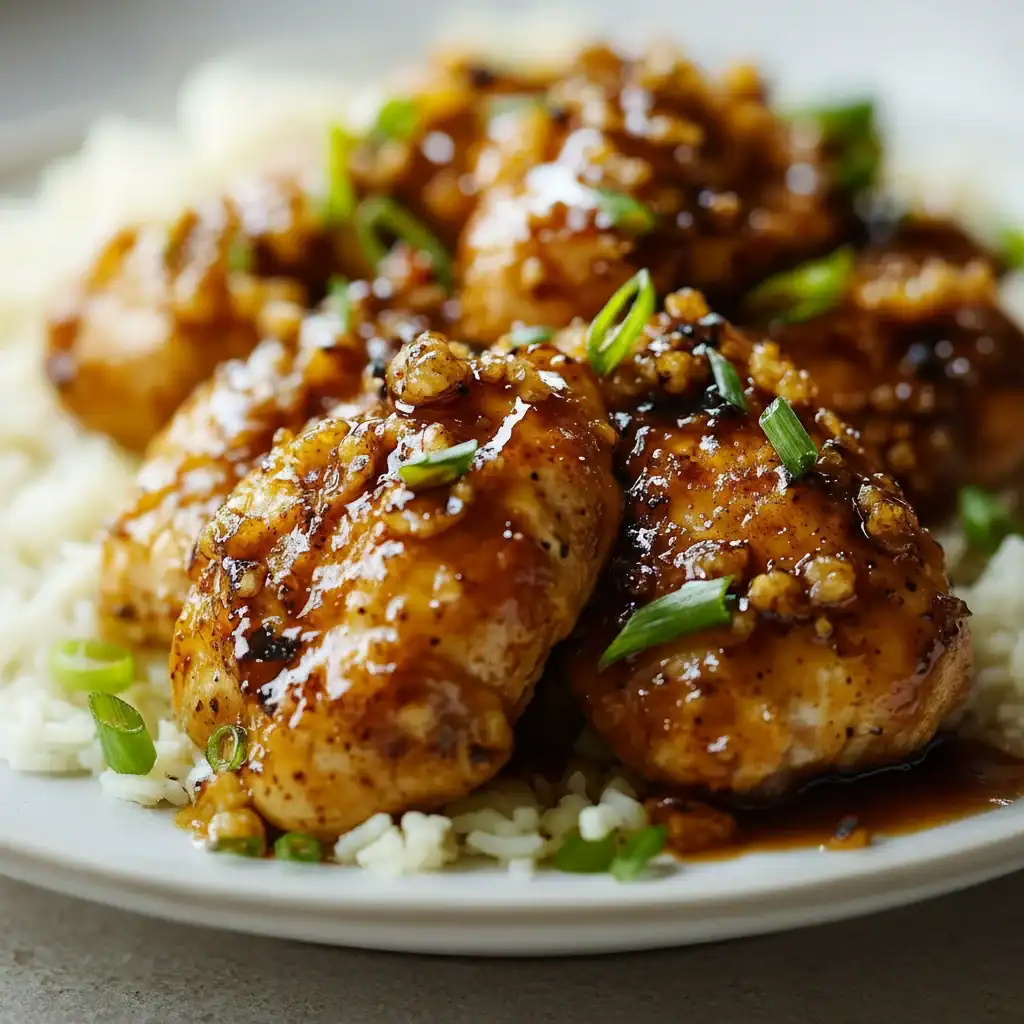
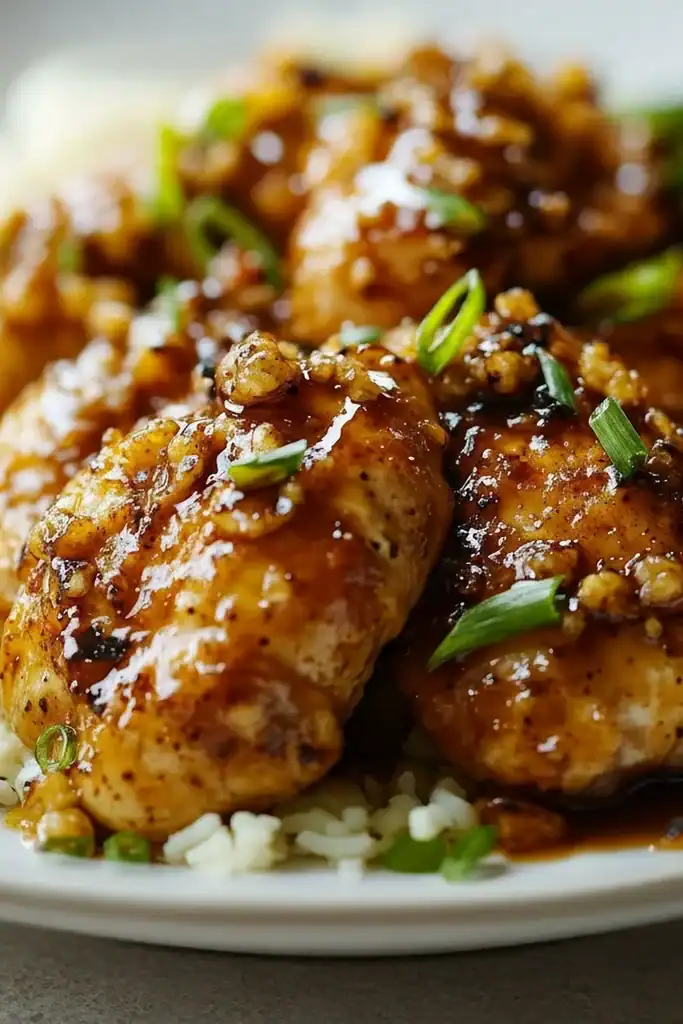
There are some dinners that just feel like a warm hug on a plate, and this Sticky Honey Garlic Glazed Chicken is exactly that for my family. It’s the kind of meal that fills the kitchen with an irresistible aroma of caramelising honey and savoury garlic, getting everyone excited before it even hits the table. The magic is in the glaze; it’s a beautiful balance of sweet and salty that transforms simple chicken breasts into something truly special. I’ve been making this glazed chicken recipe for over 6 years, and it never disappoints. It’s our go-to for a satisfying weeknight dinner that feels a little bit fancy without any of the fuss.
What we’re aiming for here is a dish that delivers on every level. The chicken becomes incredibly tender and juicy on the inside, while the outside gets coated in a glossy, sticky sauce that clings to every bite. The sauce reduces down in the pan, thickening into a gorgeous, deep amber glaze that is simply divine spooned over the chicken just before serving. It’s a straightforward chicken recipe that works beautifully for those evenings when you want a delicious, home-cooked meal that comes together in about 30 minutes. It’s a dinner that always gets compliments, whether I’m making it just for us or for guests.
Recipe Overview
This glazed chicken recipe focuses on creating a rich, flavourful sauce that perfectly coats pan-fried chicken breasts. The combination of honey, soy sauce, garlic, and a hint of ginger creates a classic sweet and savoury profile. I’ve found that letting the glaze bubble and thicken for the final minute is the key to getting that perfect sticky consistency.
- Prep Time: 10 minutes
- Cook Time: 20 minutes
- Total Time: 30 minutes
- Servings: 4 people
- Difficulty: Easy
Why You’ll Love This Glazed Chicken Recipe
- Genuine Flavour: The glaze isn’t just sweet; the dark soy sauce provides a deep, savoury umami flavour, fresh garlic gives it a gentle bite, and a touch of ginger adds a lovely warmth. It’s a well-rounded and satisfying taste.
- Ready in 30 Minutes: From start to finish, this entire meal can be on the table in half an hour, which makes it ideal for busy weeknights when you still want something wholesome and delicious.
- Flexible Recipe: You can easily swap the chicken breasts for boneless, skinless chicken thighs. If you do, just cook them for a few extra minutes per side to ensure they’re cooked through. You can also add a pinch of chilli flakes for a bit of heat.
- Great for Meal Prep: The chicken tastes wonderful the next day. I often make a double batch and have the leftovers for lunch in a salad or a wrap.
- Family Tested: My kids absolutely devour this every time I make it. They love how sticky the sauce is and always ask for extra to drizzle over their rice.
Ingredients You’ll Need
For this recipe, we use simple, accessible ingredients. When it comes to soy sauce, I really recommend using a good quality one like Kikkoman or a similar traditionally brewed brand. It makes a noticeable difference to the depth of flavour in the final glaze.
- 4 medium boneless, skinless chicken breasts (around 600-700g total)
- 1 tbsp olive oil
- 2 tbsp plain flour
- 1 tsp paprika
- 1/2 tsp salt
- 1/2 tsp black pepper
- For the Glaze:
- 120ml clear honey
- 80ml dark soy sauce
- 4 cloves garlic, finely minced
- 1 tbsp fresh ginger, grated
- 1 tbsp rice vinegar
- 1 tsp sesame oil
- 1 tbsp cornflour mixed with 2 tbsp cold water (a cornflour slurry)
- For Garnish (Optional):
- 1 tbsp sesame seeds
- 2 spring onions, finely sliced
Sophia’s Tip: If you don’t have fresh ginger, you can substitute with 1/2 teaspoon of ground ginger. While fresh is always best for that vibrant warmth, the ground version works well in a pinch!
How to Make This Glazed Chicken Recipe
The process is quite straightforward. We’ll start by preparing and searing the chicken, then create that wonderful sticky glaze right in the same pan, which means less washing up and more flavour!
- Prepare the Chicken: Pat the chicken breasts dry with a paper towel. This is crucial for getting a good sear. In a shallow dish, mix together the plain flour, paprika, salt, and pepper. Dredge each chicken breast in the flour mixture, shaking off any excess.
- Sear the Chicken: Heat the olive oil in a large frying pan over a medium-high heat. Once the oil is shimmering, carefully place the floured chicken breasts in the pan. Be sure not to overcrowd it; cook in batches if necessary.
- Cook Through: Cook the chicken for 6-8 minutes on each side, until it’s golden brown and cooked through. The internal temperature should reach 74°C. For more tips on achieving the perfect sear, BBC Good Food has a great guide to pan-frying chicken. Once cooked, remove the chicken from the pan and set it aside on a plate.
- Start the Glaze: Reduce the heat to medium-low. Add the minced garlic and grated ginger to the same pan and sauté for about 30 seconds until fragrant. Be careful not to let the garlic burn.
- Combine Glaze Ingredients: Pour in the honey, soy sauce, rice vinegar, and sesame oil. Whisk everything together, scraping up any browned bits from the bottom of the pan – that’s where so much flavour is hiding!
- Thicken the Sauce: Bring the sauce to a gentle simmer. Slowly pour in the cornflour slurry while whisking continuously. Let it bubble gently for 1-2 minutes until the sauce has thickened enough to coat the back of a spoon.
- Glaze the Chicken: Return the cooked chicken breasts to the pan. Turn them over in the sauce to coat them completely. I find that using a spoon to baste the tops of the chicken helps to build up a beautifully thick, glossy layer of glaze. Let it all simmer together for another minute.
- Serve Immediately: Remove the pan from the heat. Serve the glazed chicken straight away, garnished with a sprinkle of sesame seeds and sliced spring onions.
Tips From My Kitchen
- Temperature Control: When you add the glaze ingredients, especially the honey, make sure your pan isn’t too hot. Honey can burn quickly, so reducing the heat to medium-low is essential for a perfect, unburnt sauce.
- The Secret Step: Don’t skip drying the chicken with paper towels. I learned that this small step makes a huge difference. A dry surface allows the chicken to form a much better crust when it hits the hot pan, which helps the glaze cling to it later.
- Make-Ahead: You can mix all the glaze ingredients (except the cornflour slurry) in a jar and keep it in the fridge for up to 3 days. This makes the cooking process even faster on a busy night.
- Storage: Store any leftovers in an airtight container in the fridge for up to 3 days. Reheat gently in a pan with a splash of water to loosen the glaze, or in the microwave.
Equipment You’ll Need
- Large frying pan or skillet
- Sharp knife and cutting board
- Mixing bowls
- Whisk
- Wooden spoon or spatula
Delicious Variations to Try
While this glazed chicken recipe is fantastic as is, it’s also a great base for a few simple tweaks. Here are some ideas we’ve enjoyed:
- Spicy Version: Add 1-2 teaspoons of sriracha or a good pinch of red chilli flakes to the glaze along with the other liquid ingredients. Adjust the amount to your preferred level of heat. It gives the dish a lovely kick.
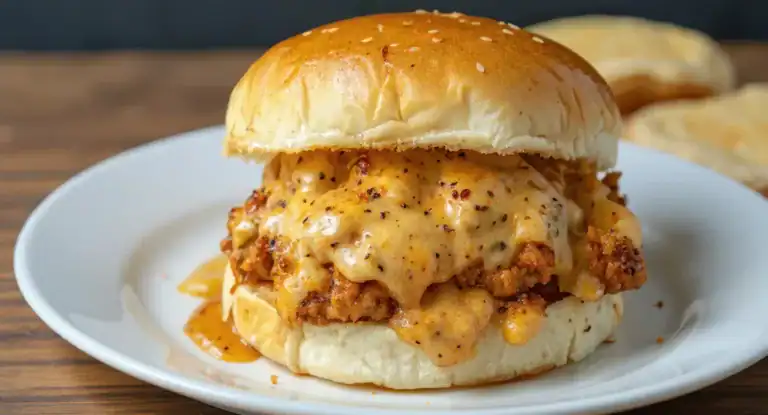
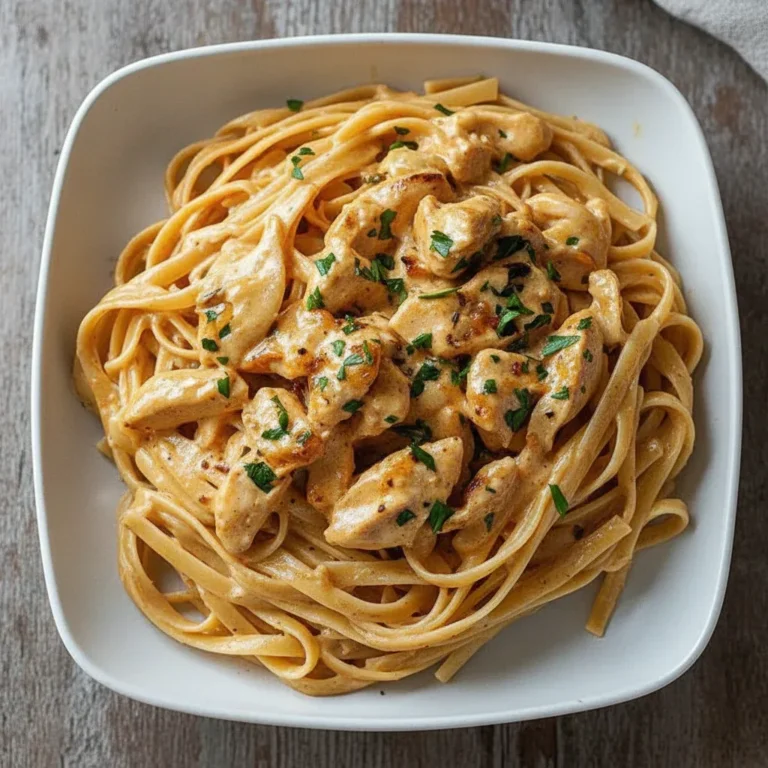
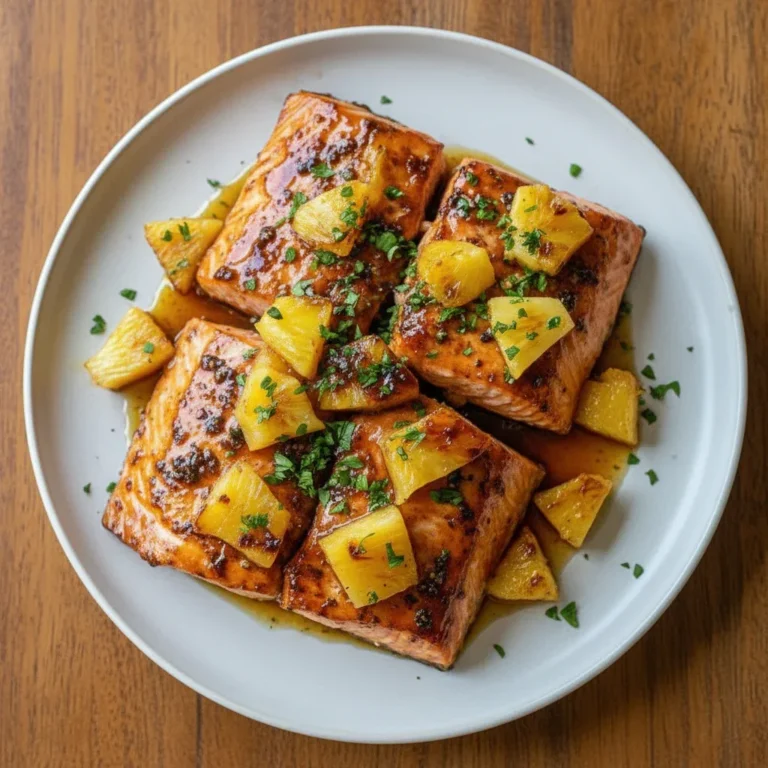
- Different Protein: This glaze works wonderfully with pork chops or even salmon fillets. For salmon, reduce the cooking time significantly, searing for about 4-5 minutes per side depending on thickness. You could also try our Bacon Brown Sugar Chicken Tenders for another take on a sweet and savoury protein.
- Add Vegetables: After searing the chicken and setting it aside, you can stir-fry some sliced bell peppers, onions, or broccoli florets in the pan for a few minutes before making the glaze. Add them back in with the chicken at the end.
What to Serve With This Glazed Chicken
This dish pairs beautifully with a few simple sides that complement the rich glaze without overpowering it.
- Steamed Jasmine Rice: This is the classic pairing. The fluffy rice is perfect for soaking up any extra honey garlic glaze from the plate.
- Steamed Greens: A side of steamed broccoli, asparagus, or bok choy provides a fresh, clean contrast to the richness of the chicken. A light drizzle of sesame oil on the greens works well.
- Creamy Mashed Potatoes: For a more comforting meal, creamy mash is a fantastic choice. The savoury glaze acts almost like a gravy.
- Dessert: After this savoury dish, a light and fruity dessert like my Peach Crumb Cheesecake would be a delightful finish.
Frequently Asked Questions
Glazed Chicken Recipe
Ingredients
Method
- Prepare the Chicken: Pat the chicken breasts dry with a paper towel. This is crucial for getting a good sear. In a shallow dish, mix together the plain flour, paprika, salt, and pepper. Dredge each chicken breast in the flour mixture, shaking off any excess.
- Sear the Chicken: Heat the olive oil in a large frying pan over a medium-high heat. Once the oil is shimmering, carefully place the floured chicken breasts in the pan. Be sure not to overcrowd it; cook in batches if necessary.
- Cook Through: Cook the chicken for 6-8 minutes on each side, until it's golden brown and cooked through. The internal temperature should reach 74°C. For more tips on achieving the perfect sear, BBC Good Food has a great guide to pan-frying chicken. Once cooked, remove the chicken from the pan and set it aside on a plate.
- Start the Glaze: Reduce the heat to medium-low. Add the minced garlic and grated ginger to the same pan and sauté for about 30 seconds until fragrant. Be careful not to let the garlic burn.
- Combine Glaze Ingredients: Pour in the honey, soy sauce, rice vinegar, and sesame oil. Whisk everything together, scraping up any browned bits from the bottom of the pan – that’s where so much flavour is hiding!
- Thicken the Sauce: Bring the sauce to a gentle simmer. Slowly pour in the cornflour slurry while whisking continuously. Let it bubble gently for 1-2 minutes until the sauce has thickened enough to coat the back of a spoon.
- Glaze the Chicken: Return the cooked chicken breasts to the pan. Turn them over in the sauce to coat them completely. I find that using a spoon to baste the tops of the chicken helps to build up a beautifully thick, glossy layer of glaze. Let it all simmer together for another minute.
- Serve Immediately: Remove the pan from the heat. Serve the glazed chicken straight away, garnished with a sprinkle of sesame seeds and sliced spring onions.
Notes
I hope you and your family enjoy this Glazed Chicken Recipe as much as we do. It’s a reliable, flavour-packed meal that has earned a permanent spot in our dinner rotation. If you give it a try, I’d love to hear how it turned out! Please feel free to leave a comment below with your experience. Happy cooking!
– Sophia