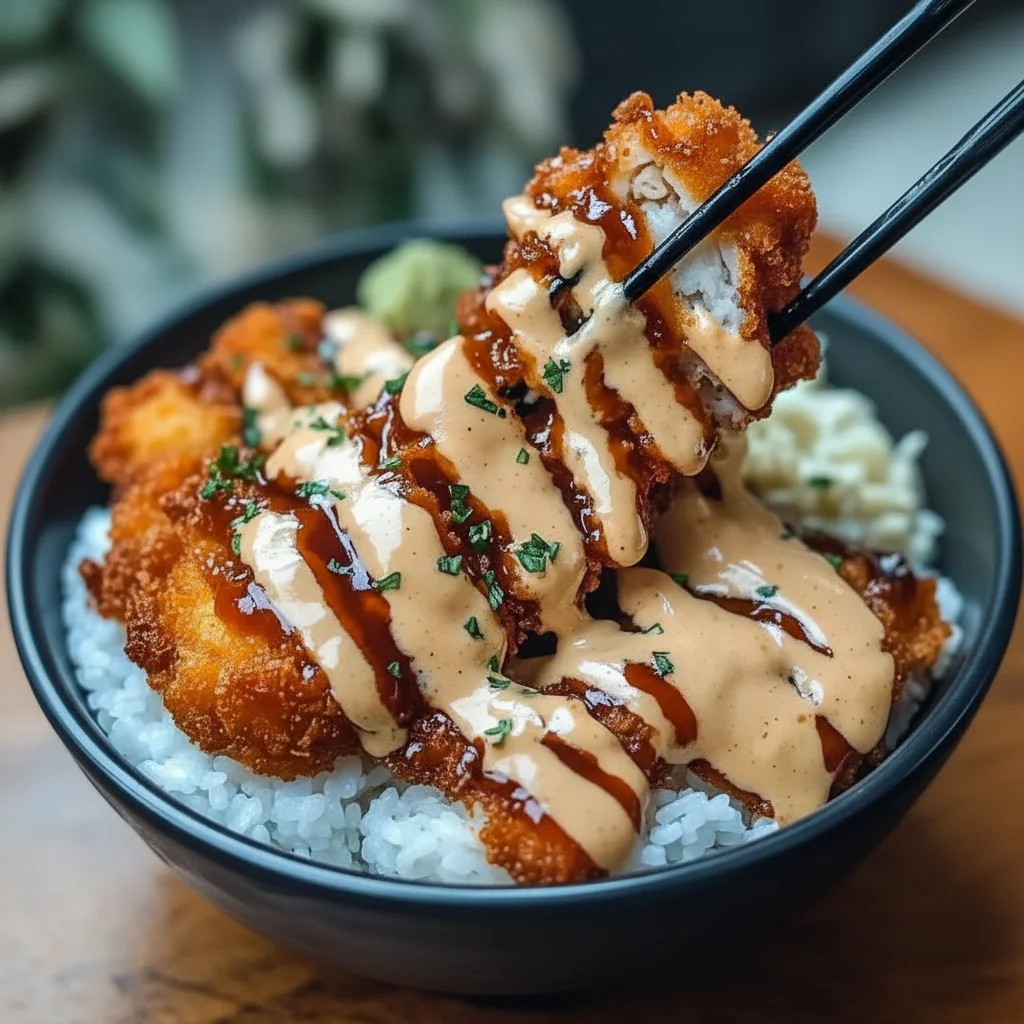
Japanese Katsu Bowls Recipe – Crispy Chicken Rice Bowl
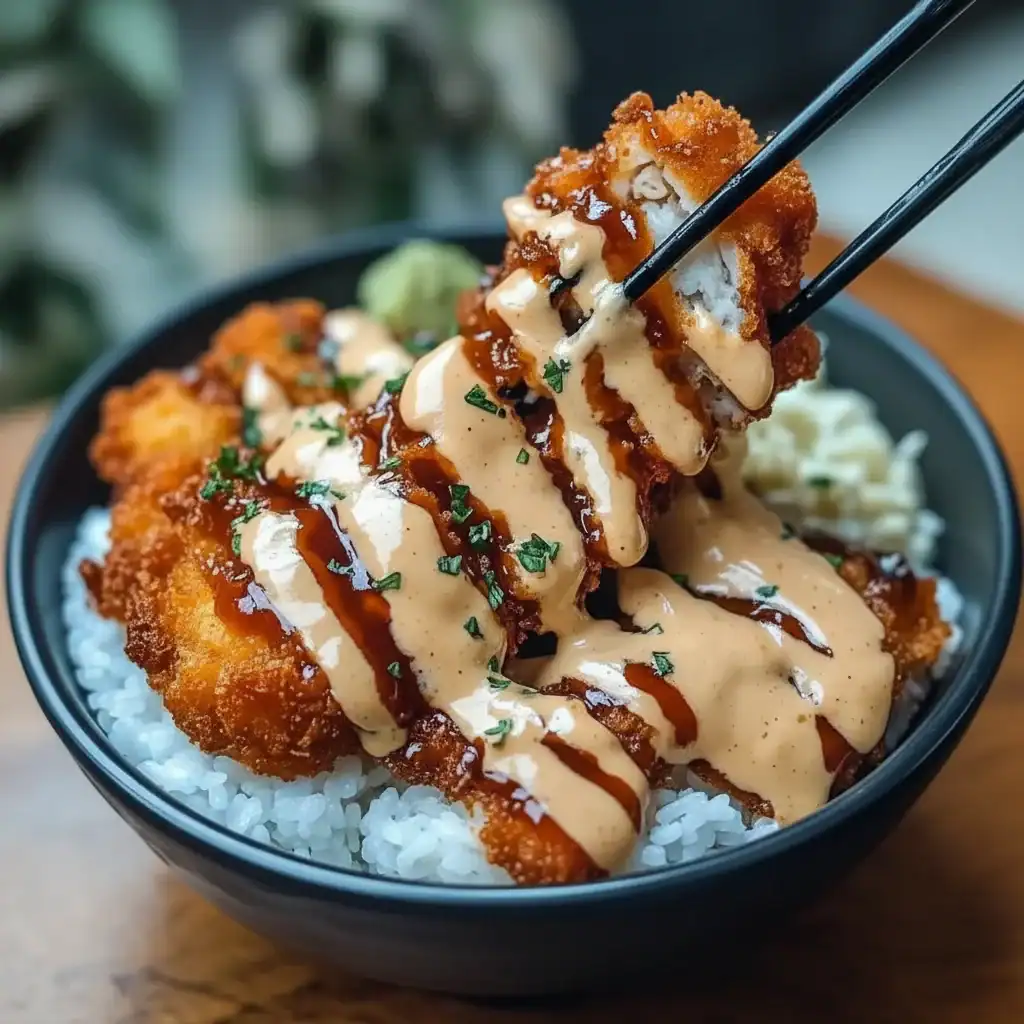
There’s a special kind of comfort found in a bowl of crispy, golden chicken served over perfectly steamed rice, all brought together with a luscious, tangy sauce. If this sounds like your perfect meal, then we’re thrilled to share our definitive Japanese Katsu Bowls Recipe. It’s time to say goodbye to uninspired weeknight dinners and hello to a dish brimming with vibrant flavours and delightful textures. The magic lies in the combination of a crunchy panko coating, succulent chicken, and our simple yet delicious homemade tonkatsu sauce. We’re confident that once you see how easy it is to whip up this restaurant-favourite in your own kitchen, it will become a regular feature on your menu.
Why You’ll Love This Recipe
- A Wonderful Mix of Textures: Every mouthful is a joy. You’ll get the fantastic crunch of the panko, the tender, juicy chicken, the pillowy softness of the rice, and the sweet-and-sour notes of our special sauce. It’s a truly balanced and gratifying meal.
- Surprisingly Quick to Make: Although it tastes like it came from a professional kitchen, this katsu bowl is remarkably simple to prepare. You can have this stunning meal ready in about 30 minutes, making it an ideal choice for a busy evening.
- Simple and Honest Ingredients: At its core, this is a beautiful chicken and rice dish. We use quality chicken breast and a few cupboard staples to create the sauce, so you know exactly what’s going into your food. Just pure, unadulterated flavour.
- Fantastically Versatile: Think of this recipe as your starting point. You can easily switch the chicken for pork to create a classic Tonkatsu, or use firm tofu or aubergine slices for a brilliant vegetarian option. Feel free to add your own flair with toppings like pickled ginger or a runny egg.
What Exactly is a Katsu Bowl?
Before we get cooking, let’s explore what makes a katsu bowl so wonderful. The term “Katsu” (カツ) is a shorter version of “katsuretsu” (カツレツ), the Japanese take on the word “cutlet”. It refers to a piece of meat, usually chicken or pork, that’s been coated in flour, dipped in egg, and covered in panko breadcrumbs before being fried to a perfect golden-brown. “Don” (丼) signifies the large bowl the meal is served in, typically over a bed of rice. So, a katsu bowl is a classic Japanese rice bowl dish crowned with a crispy fried cutlet. While many variations exist, our version focuses on a clean and simple presentation that lets the crispy chicken and our amazing sauce really be the stars.
The Secret to That Irresistible Crunch: Panko!
The absolute key to achieving that signature light, airy, and ultra-crispy crust lies in using panko breadcrumbs. What sets them apart from regular breadcrumbs? Panko is crafted from a special white bread baked without crusts. This bread is then milled into large, flaky crumbs which absorb significantly less oil when fried. The outcome is a coating that remains wonderfully crunchy for much longer. You can usually find panko in the world foods aisle of most large supermarkets, and we can’t recommend it enough. It truly elevates this chicken katsu recipe from simply good to utterly sensational.
Homemade Tonkatsu Sauce: The Perfect Finishing Touch
While the crispy chicken is the main event, our homemade tonkatsu sauce is its essential partner. This sauce is a fundamental part of Japanese katsu dishes, offering a perfect harmony of sweet, savoury, and tangy notes that beautifully cuts through the richness of the fried chicken. Although you can purchase pre-made versions, our homemade sauce is incredibly easy to prepare using ingredients you likely already have. It’s a straightforward blend of ketchup, Worcestershire sauce, soy sauce, and a little sweetness. Whisking it all together takes just a few seconds and lets you adjust the flavour to your preference. Making it yourself is so much more rewarding and tastes infinitely better than store-bought.
Ingredients
- 2 large skinless, boneless chicken breasts (about 400-500g total)
- 75g plain flour
- 1/2 teaspoon salt
- 1/4 teaspoon black pepper
- 1 large free-range egg, beaten
- 100g panko breadcrumbs
- Vegetable or sunflower oil, for shallow frying
- 4 tablespoons tomato ketchup
- 2 tablespoons Worcestershire sauce
- 1 tablespoon soy sauce
- 1 tablespoon mirin (or 1 teaspoon caster sugar)
- 1/2 teaspoon garlic powder
- 300g sushi rice or other short-grain rice, cooked according to packet instructions
- 2 spring onions, finely sliced
- 1 teaspoon toasted sesame seeds, for garnish
Instructions
- Craft the Tonkatsu Sauce: We’ll begin with the flavour-packed sauce, which is the easiest step. In a small bowl, simply combine the ketchup, Worcestershire sauce, soy sauce, mirin (or sugar), and garlic powder. Give it a good whisk until the mixture is smooth and glossy. Set this aside to let the flavours mingle beautifully while you get on with the chicken.
- Prepare the Chicken: Lay your chicken breasts on a chopping board and place a sheet of cling film over them. Using a rolling pin or a meat tenderiser, gently flatten the chicken to a uniform thickness of around 1.5cm. This is a vital step as it helps the chicken cook through quickly and evenly, keeping it lovely and juicy.
- Arrange Your Coating Station: For a smooth and clean breading process, set up three shallow dishes. In the first, mix together the plain flour, salt, and pepper. Pour the beaten egg into the second dish. Finally, spread the panko breadcrumbs out in the third dish.
- Coat the Chicken Cutlets: Take one chicken breast at a time. First, dredge it thoroughly in the seasoned flour, tapping off any excess. Next, dip it into the beaten egg, making sure it’s fully coated before letting the surplus drip away. Lastly, press it firmly into the panko breadcrumbs, covering all sides generously for that perfect crunch. Set the coated chicken aside on a clean plate.
- Fry to Golden-Brown Bliss: Pour enough vegetable oil into a large, sturdy frying pan to a depth of about 1cm. Heat the oil over a medium-high temperature. To check if it’s hot enough, drop in a single panko crumb – if it sizzles straight away, you’re ready to go. Gently place the breaded chicken into the pan, being careful not to overcrowd it. Cook in two batches if you need to.
- Cook and Drain: Fry the chicken for approximately 3-4 minutes on each side until it is a beautiful deep golden brown and cooked through. To be certain, the internal temperature should be 75°C. Transfer the cooked chicken to a wire rack. This allows air to circulate, keeping the underside just as crispy as the top. Let it rest for a couple of minutes before you slice it.
- Assemble Your Katsu Bowls: This is the best part! Slice your rested chicken katsu into strips about 1-2cm wide. To build your bowls, share the cooked rice between them. Arrange the sliced chicken katsu attractively over the rice. Be generous with your homemade tonkatsu sauce, drizzling it all over. To finish, garnish with sliced spring onions and a scattering of toasted sesame seeds. For a more complete meal, serve with some steamed vegetables or a crisp side salad. If you fancy trying another exciting chicken dish, have a look at our Bang Bang Chicken Thighs.
Frequently Asked Questions
And that’s all there is to it! Our simple and incredibly tasty Japanese katsu bowls recipe brings an authentic taste of Japan straight to your dinner table. This isn’t just another chicken and rice meal; it’s a delightful experience of textures and flavours that we’re sure will become a new family favourite. It’s special enough for a Saturday night but speedy enough for a midweek meal. If you have room for dessert, you must try our indulgent Biscoff Truffles. We would love to hear how you get on, so please leave a comment with any questions or share a photo of your finished dish with us!
Recipe Card
Ingredients
- 2 large skinless, boneless chicken breasts (about 400-500g total)
- 75g plain flour
- 1/2 teaspoon salt
- 1/4 teaspoon black pepper
- 1 large free-range egg, beaten
- 100g panko breadcrumbs
- Vegetable or sunflower oil, for shallow frying
- 4 tablespoons tomato ketchup
- 2 tablespoons Worcestershire sauce
- 1 tablespoon soy sauce
- 1 tablespoon mirin (or 1 teaspoon caster sugar)
- 1/2 teaspoon garlic powder
- 300g sushi rice or other short-grain rice, cooked according to packet instructions
- 2 spring onions, finely sliced
- 1 teaspoon toasted sesame seeds, for garnish
Instructions
- Make the Tonkatsu Sauce: Let’s start with the easiest part, which is also packed with flavour. In a small bowl, combine the tomato ketchup, Worcestershire sauce, soy sauce, mirin (or caster sugar), and garlic powder. Whisk everything together until you have a smooth, glossy sauce. Set it aside for the flavours to meld while you prepare the chicken.
- Prepare the Chicken: Place the chicken breasts on a chopping board and cover them with a piece of cling film. Using a rolling pin or a meat mallet, gently flatten the chicken breasts to an even thickness of about 1.5cm (just over half an inch). This is a crucial step as it ensures the chicken cooks quickly and evenly without drying out.
- Set Up Your Breading Station: You’ll need three shallow dishes or plates. In the first, mix the plain flour with the salt and black pepper. In the second, lightly beat the egg. In the third, spread out the panko breadcrumbs. This organised setup makes the breading process smooth and mess-free.
- Coat the Chicken: Working with one chicken breast at a time, dredge it in the seasoned flour, making sure it’s completely coated, and then shake off any excess. Next, dip it into the beaten egg, allowing any excess to drip off. Finally, press the chicken firmly into the panko breadcrumbs, ensuring it’s generously and evenly coated on all sides. Place the breaded chicken on a clean plate.
- Fry to Golden Perfection: Pour enough vegetable oil into a large, heavy-bottomed frying pan to come about 1cm up the sides. Heat the oil over a medium-high heat. You can test if it’s ready by dropping a panko crumb in; if it sizzles immediately, the oil is at the right temperature. Carefully lay the breaded chicken breasts in the hot oil. Be careful not to overcrowd the pan; cook in batches if necessary.
- Cook and Rest: Fry the chicken for about 3-4 minutes on each side, until it’s a deep golden brown, crispy, and cooked all the way through. The internal temperature should reach 75°C (165°F). Remove the cooked chicken from the pan and place it on a wire rack to drain. Letting it rest on a wire rack instead of a paper towel helps keep the bottom crispy. Let the chicken rest for a few minutes before slicing.
- Assemble Your Japanese Katsu Bowls: Now for the fun part! Slice the rested chicken katsu into 1-2cm thick strips. To assemble your bowls, divide the cooked sushi rice between two bowls. Fan the sliced chicken katsu over the rice. Drizzle generously with your homemade tonkatsu sauce. Finally, garnish with a sprinkle of finely sliced spring onions and toasted sesame seeds. For a more substantial meal, this dish is fantastic with some simple stir-fried veg or a side salad. If you’re looking for more exciting chicken recipes, why not try our Bang Bang Chicken Thighs for another flavour-packed meal?