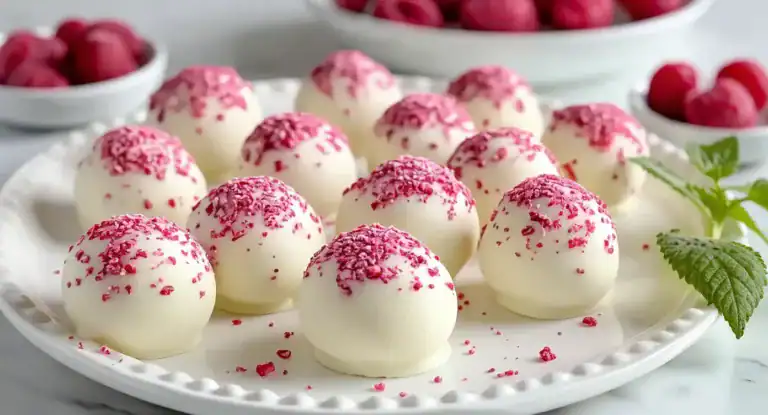
Irresistible Peanut Butter Truffles with Chocolate Coating
Our Favourite Peanut Butter Truffles Recipe (It’s So Simple!)
Do you ever get a longing for that flawless, heavenly pairing of sumptuous chocolate and smooth peanut butter? That dissolve-on-your-tongue sensation that is the very definition of indulgence? We know the feeling well, and we believe we’ve discovered the perfect solution. Move over, shop-bought confectionery; we’re about to guide you through making the most luxurious, delightful, and incredibly straightforward Peanut Butter Truffles from the comfort of your home. This is the kind of treat that gets everyone begging for your secret.
These small orbs of happiness are ideal for spontaneous get-togethers, festive gift boxes, or just a quiet evening when you fancy a little something special. They capture the essence of your favourite peanut butter cups but are elevated with a personal, homemade touch. We see this as more than a simple recipe—it’s your ticket to being the hero of every school fair and family celebration. Let’s begin and make something wonderful together.
Why You’ll Love This Recipe
- No Oven Required: There’s no need to preheat the oven for this one! It’s the ultimate no-bake peanut butter candy. The method involves simple mixing, chilling, and dipping, which makes it ideal for beginners and a brilliant activity to share with children.
- Basic Pantry Staples: You won’t find any complicated or elusive ingredients here. You probably already have the essentials—peanut butter, icing sugar, butter, and chocolate—in your cupboard.
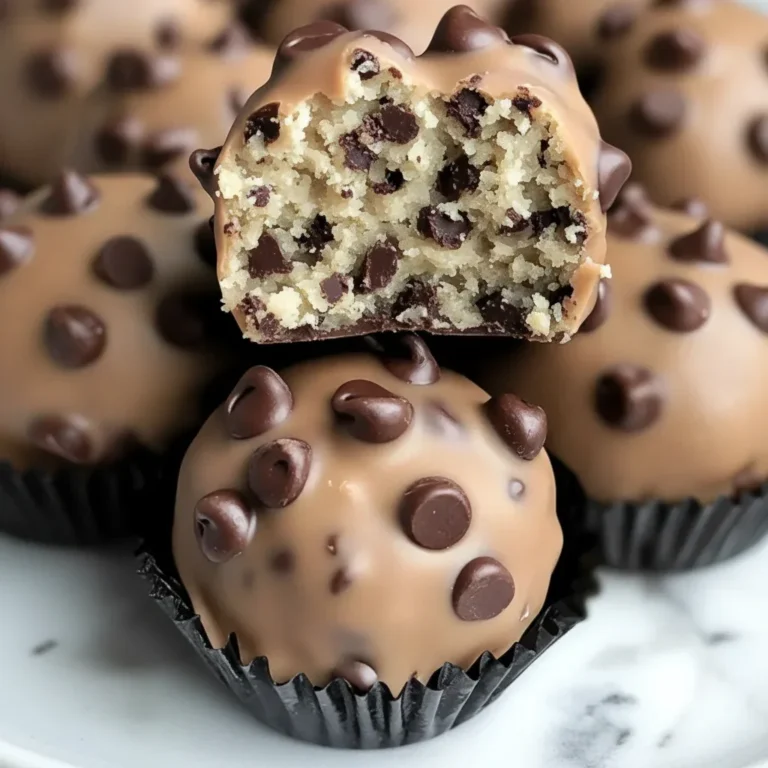
- Incredibly Delicious Flavour: We’ve fine-tuned the balance between sweet and salty. The creamy, luxurious peanut butter centre is wonderfully complemented by a crisp, smooth chocolate coating. It’s a truly Reese’s inspired delight, but we think it’s even better!
- Ideal for Gifting: Pop these beautiful truffles into a little box adorned with a ribbon, and you have a thoughtful and impressive handmade present for Christmas, birthdays, or just to say thank you.
- Infinitely Adaptable: While the original recipe is sublime, we will also share how you can get creative with different chocolates, exciting mix-ins, and lovely toppings to make these truffles your own. For other enjoyable, customisable bakes, you may also adore our Biscoff Rice Krispie Treats.
Ingredients
- smooth peanut butter
- unsalted butter
- pure vanilla extract
- fine sea salt
- icing sugar
- good-quality chocolate
- coconut oil or vegetable shortening
- flaky sea salt
- chopped nuts
- white chocolate
How to Make Peanut Butter Truffles: A Step-by-Step Guide
Crafting these wonderful treats is a very direct process. We’ve laid it all out in easy-to-follow steps to guarantee you get perfect results. The most vital ingredient of all? A touch of patience while things are chilling!
Step 1: Create the Creamy Peanut Butter Filling
To begin, take a large mixing bowl. With an electric hand mixer or a stand mixer using the paddle attachment, cream together the softened butter and smooth peanut butter on a medium setting. Continue mixing for 1–2 minutes, or until the mixture is fully integrated and smooth. Remember to pause and scrape the sides of the bowl to make sure it’s all blended evenly.
Step 2: Add Flavour and Sweetness
Now, blend in the vanilla extract and fine sea salt. After that, turn the mixer to a low speed and slowly incorporate the sifted icing sugar. Continue to mix until the sugar is completely worked in and the mixture begins to form a dense, dough-like substance. It might appear a little crumbly initially, but it will soon combine. If it seems overly dry, a small drop of milk (one teaspoon at a time) can be added, although this is seldom required.
Step 3: Chill the Filling
This is a non-negotiable step! Cover your bowl with cling film and pop it into the fridge to chill for at least 30 to 60 minutes. Chilling the filling makes it firm and significantly easier to roll into balls. Resisting the urge to skip this will save you from a very sticky situation!
Step 4: Roll the Peanut Butter Balls
When the filling has firmed up, prepare a large baking tray or a few plates by lining them with baking parchment. Take a small cookie scoop or a tablespoon to portion out the chilled mixture. Roll each piece between your hands to create a uniform ball, roughly 1 inch across. Arrange the rolled balls on your prepared tray. This recipe should yield about 35–40 truffles.
Step 5: Freeze for Firmness
Transfer the tray of peanut butter balls to the freezer for a minimum of 30 minutes. Freezing them ensures they become very solid, which is the secret to a neat and simple dipping experience. A cold truffle helps the melted chocolate to set almost instantly, which stops the balls from disintegrating in the warm coating.
Step 6: Melt the Chocolate Coating
As the truffles are freezing, you can get the chocolate coating ready. There are two simple methods for melting the chocolate:
- Microwave Method: Put the chopped chocolate and optional coconut oil into a microwave-safe bowl. Heat it in 30-second bursts, stirring thoroughly after each one, until the chocolate is nearly all melted. Give it a final stir to dissolve any remaining lumps, which will create a silky, glossy finish. Take care not to let it overheat.
- Double Boiler Method: Pour about an inch of water into a small saucepan and let it come to a gentle simmer. Place a heatproof bowl containing the chocolate and coconut oil over the pan, ensuring the bowl’s base doesn’t touch the water. Stir constantly until the chocolate has melted into a smooth liquid. For a truly professional sheen, you could look into how to temper chocolate, which gives it that characteristic snap and shine.
Step 7: Dip the Truffles
Take the solidified peanut butter balls out of the freezer. Working with one at a time, drop a ball into the melted chocolate. Using two forks or a special dipping tool, gently roll it until it is completely covered. Lift the truffle from the chocolate, letting any extra drip off back into the bowl. Place the coated truffle back onto the parchment-lined tray with care.
Step 8: Decorate and Set
If you plan to add toppings like flaky sea salt or sprinkles, you’ll need to add them right after dipping, while the chocolate coating is still liquid. Continue this dipping process until all the balls are coated. Once finished, move the tray to the refrigerator for around 15–20 minutes, or until the chocolate has become completely firm. And just like that, you’ve made perfect chocolate covered peanut butter balls!
Top Tips for the Best Homemade Candy
To ensure this easy homemade candy recipe is a triumph every time, we’ve put together our most helpful hints and tips.
- Select the Best Peanut Butter: For an optimal texture, we recommend a standard, processed smooth peanut butter. Natural varieties often have oil separation, which can result in a filling that is too greasy or soft.
- The Chilling and Freezing Steps are Essential: We cannot overstate this! Chilling the filling and then freezing the rolled balls is the secret to a clean dipping process and beautifully formed truffles.
- A Deep Bowl is Best for Dipping: When melting your chocolate, a deeper, narrower bowl is more effective than a wide, shallow one. This makes it far simpler to fully submerge each truffle.
- Act Fast: Make sure your toppings are prepared before you begin dipping. The chocolate sets very quickly on the cold truffles, so you must be swift if you wish to add decorations.
Variations to Try
One of the finest qualities of these peanut butter truffles is their versatility. Here are some suggestions to spark your imagination:
Chocolate Choices
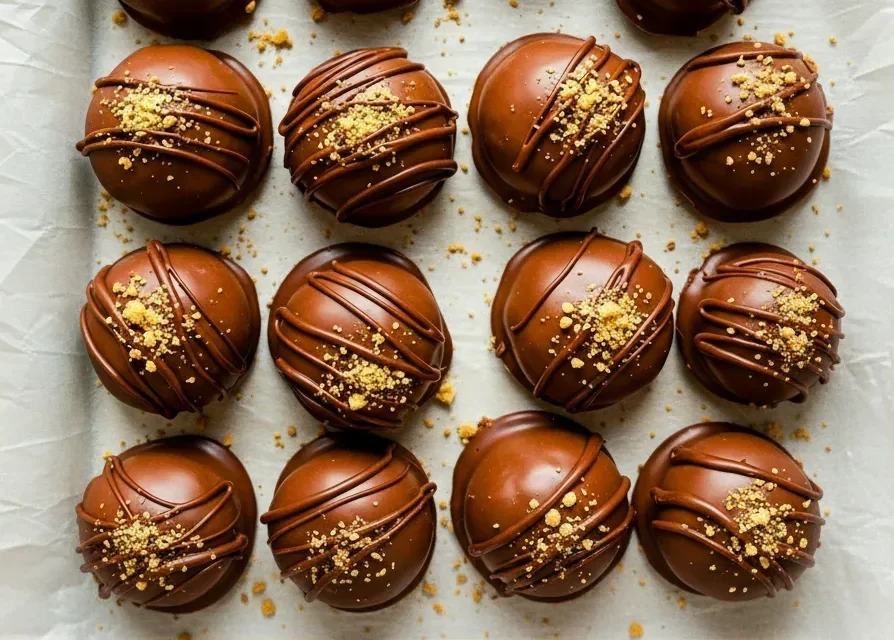
You don’t have to stick to just one type of chocolate! Consider dipping them in intense dark chocolate for a more refined taste, classic milk chocolate for a sweeter profile, or even white chocolate for an eye-catching look. A drizzle of a contrasting chocolate always looks spectacular.
Fun Mix-Ins
Why not add some extra texture to the peanut butter filling? Try incorporating around 60g of Rice Krispies for a satisfying crunch, or add some mini chocolate chips for an even richer chocolate flavour. For another delightful treat idea, take a look at these Apple Cider Whoopie Pies.
Creative Toppings
- A light dusting of flaky sea salt wonderfully enhances the overall flavour.
- Vibrant sprinkles can add a cheerful, celebratory feel for birthdays and holidays.
- Finely chopped peanuts or other nuts provide a delightful textural contrast.
- For a professional touch, melt a little contrasting chocolate (e.g., white over dark) and artistically drizzle it over the set truffles.
How to Store Your Peanut Butter Truffles
These truffles store beautifully, which makes them a superb option for a make-ahead treat. Keep them in an airtight container in the fridge for up to two weeks. We think they taste best served slightly chilled. For longer-term storage, they can also be frozen. Arrange them in a single layer inside a freezer-safe container or bag for up to three months. Allow them to thaw in the refrigerator for an hour or two before serving.
FAQ
The Perfect Treat for Any Occasion
So there you have it—a simple and rewarding recipe for the most wonderful Peanut Butter Truffles you are ever likely to taste. This no-bake marvel demonstrates that you don’t need to be an expert baker to make something truly exceptional. The blend of a soft, sweet, and salty peanut butter core encased in a crisp chocolate shell is nothing short of perfection.
We heartily encourage you to head to the kitchen and give this recipe a go. Whether you’re making them as a personal treat, for your family, or to give as a gift, they are certain to bring a lot of joy. If you do make these truffles, we’d be delighted if you’d leave a comment below to let us know how you got on. We always love to hear from you!
Recipe Card
Ingredients
- 250g (1 cup) smooth peanut butter (commercial, not natural)
- 115g (1/2 cup) unsalted butter, softened
- 240g (2 cups) icing sugar, sifted
- 1 tsp pure vanilla extract
- 1/4 tsp fine sea salt
- 340g (12 oz) good-quality chocolate (milk or semi-sweet), chopped
- 1 tbsp coconut oil or vegetable shortening (optional, for thinning chocolate)
- Optional toppings: flaky sea salt, sprinkles, chopped nuts
Instructions
- In a large bowl with an electric mixer, cream together the peanut butter and softened butter until fully combined and smooth.
- Beat in the vanilla extract and salt. On low speed, gradually add the sifted icing sugar and mix until a dense dough forms.
- Cover the bowl and chill the filling in the refrigerator for 30-60 minutes, or until firm enough to handle.
- Line a large baking tray with parchment paper. Roll the chilled mixture into 1-inch balls and place them on the tray.
- Freeze the balls for at least 30 minutes until solid. Do not skip this step, as it prevents the balls from melting during dipping.
- While the balls are freezing, melt the chopped chocolate with the optional coconut oil in a microwave (in 30-second bursts, stirring in between) or over a double boiler until smooth.
- Dip each frozen ball into the melted chocolate, using two forks to coat it completely. Allow any excess chocolate to drip off.
- Place the coated truffle back on the parchment paper and immediately add any toppings while the chocolate is still wet.
- Refrigerate the truffles for 15-20 minutes to allow the chocolate to set completely before serving.
Calories: 130,
Carbs: 12 g,
Protein: 2 g,
Fat: 8 g