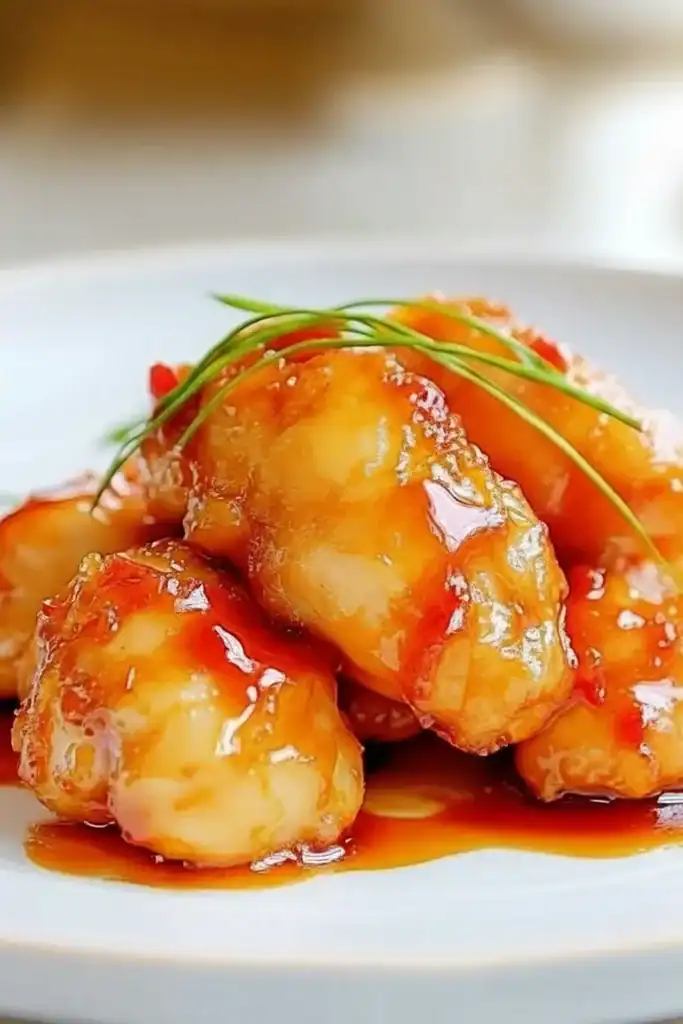
Sweet Sour Chicken | Takeout Style
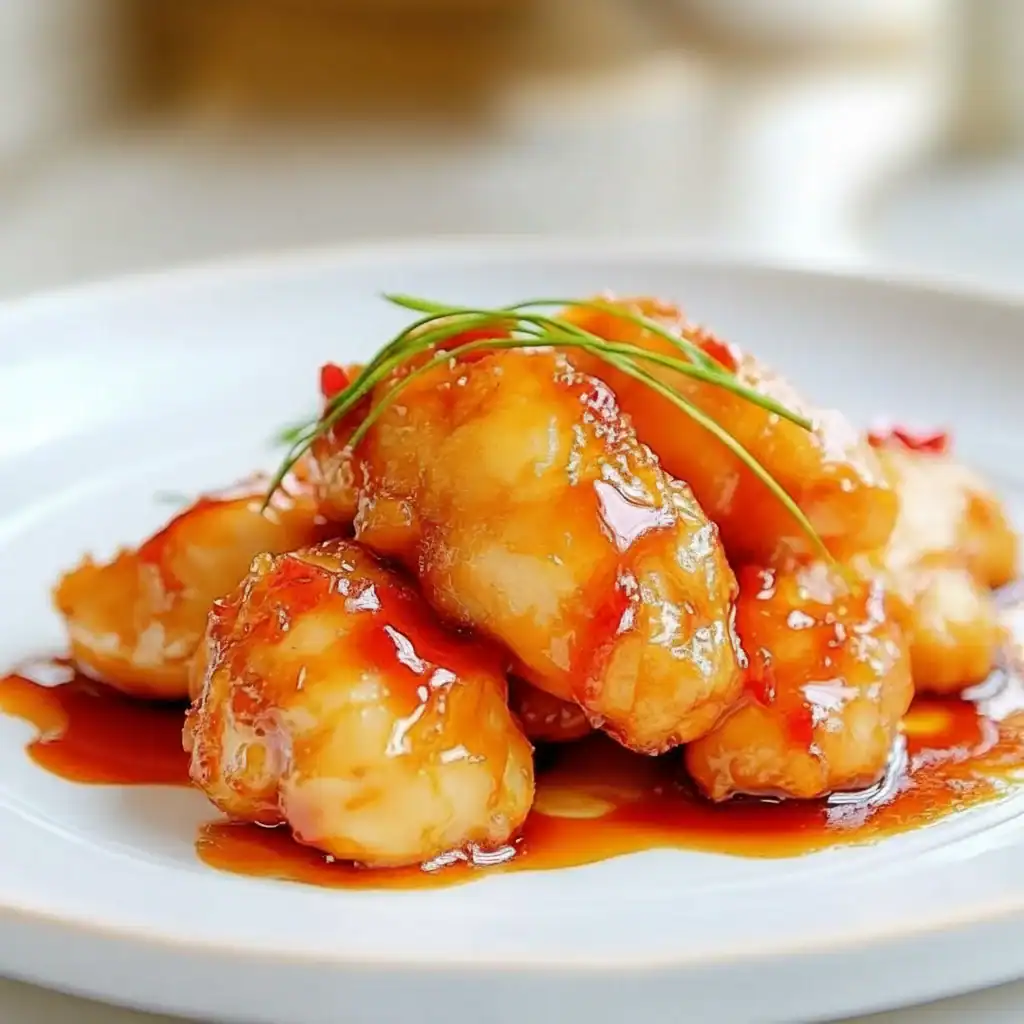
There’s something truly satisfying about recreating a takeaway favourite at home, and getting it even better than you remember. For me, that dish is Sweet and Sour Chicken. Forget the gloopy, overly sweet sauces and soggy batters of disappointing takeaways. We’re making a version with chunks of tender chicken in a genuinely crispy coating, all tossed in a vibrant, glossy sauce that perfectly balances tangy and sweet. It’s a colourful, brilliant dish that comes together with surprising speed. This is my go-to recipe when I need something that feels a bit special for a weeknight, but doesn’t require hours in the kitchen.
The secret, I’ve found, is in the details: the double coating for the chicken that stays crisp even after being sauced, and a sauce made from scratch with simple ingredients. There are no mysterious powders or bright red food colourings here. We use pineapple juice for a natural sweetness, rice vinegar for a clean, sharp tang, and a little bit of ketchup for depth and colour. It’s a classic dish for a reason, with roots in Cantonese cuisine, but this homemade version will make you feel like a true kitchen hero.
This recipe works beautifully for a family dinner where you want to serve something everyone will enjoy, or for a casual evening with friends. It’s interactive, delicious, and the kind of meal that brings everyone to the table with a smile. Let’s get cooking!
Recipe Overview
This recipe guides you through creating a restaurant-quality Sweet Sour Chicken at home. Expect incredibly crisp chicken pieces enveloped in a beautifully balanced, tangy sauce with tender-crisp vegetables. After testing this recipe five times, I finally got the sauce-to-chicken ratio and the crispiness of the batter just right.
- Prep Time: 20 minutes
- Cook Time: 15 minutes
- Total Time: 35 minutes
- Servings: 4 people
- Difficulty: Medium
Why You’ll Love This Sweet Sour Chicken
- Genuine Flavour: The sauce is the star here. It has a bright tang from the rice vinegar, a fruity sweetness from pineapple juice, and a savoury depth from soy sauce. It coats the chicken beautifully without being overly thick or sugary.
- Ready in Under 40 Minutes: From chopping the chicken to serving up, this entire meal comes together in about 35 minutes, making it ideal for a busy weeknight when you want something special.
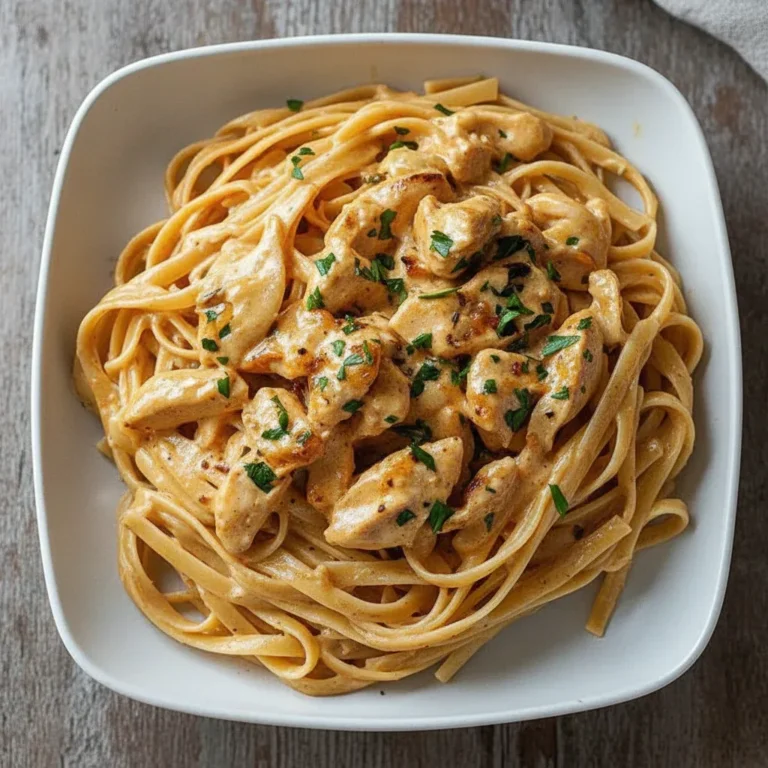
- Flexible Recipe: Don’t have bell peppers? Swap them for broccoli florets or sliced carrots. You can also add a handful of cashew nuts at the end for extra crunch. If you’re a fan of slightly different flavour profiles in your chicken dishes, you must try my Bang Bang Chicken Thighs too.
- Great for a “Fakeaway” Night: It’s the ultimate dish for a Friday night in. It feels indulgent and satisfying, giving you all the joy of a takeaway but with fresher ingredients and a much better taste.
- Family Tested: My family absolutely adores this version. The kids love the crispy chicken pieces and the sweet sauce, and it’s a meal that always gets compliments and requests for seconds.
Ingredients You’ll Need
For the best results, try to use fresh ingredients where possible, especially the pineapple and peppers. I prefer using Kikkoman light soy sauce as I find its flavour is well-rounded and not overly salty, which is crucial for balancing the sauce.
- For the Crispy Chicken:
- 500g skinless, boneless chicken breasts, cut into 2.5cm (1-inch) cubes
- 1 large egg, lightly beaten
- 60g cornflour
- 60g plain flour
- ½ tsp salt
- ¼ tsp white pepper
- Approx. 250ml vegetable or sunflower oil, for frying
- For the Sweet and Sour Sauce:
- 120ml pineapple juice (from a can of pineapple chunks is fine)
- 80ml rice vinegar
- 4 tbsp soft light brown sugar
- 3 tbsp tomato ketchup
- 2 tbsp light soy sauce
- 1 tbsp cornflour mixed with 2 tbsp cold water (a slurry)
- For the Stir-fry:
- 1 tbsp vegetable oil
- 1 medium onion, cut into chunks
- 1 red bell pepper, deseeded and cut into chunks
- 1 green bell pepper, deseeded and cut into chunks
- 225g can of pineapple chunks in juice, drained (reserve the juice for the sauce)
- Spring onions, sliced, for garnish
- Toasted sesame seeds, for garnish
Sophia’s Tip: If you can find it, using fresh pineapple juice gives the sauce an even brighter, more authentic flavour. Just be sure to strain it to remove any pulp before adding it to the sauce mixture.
How to Make Sweet Sour Chicken
The process is straightforward. We’ll start by preparing and frying the chicken to get it perfectly crisp, then we’ll whip up the sauce and bring everything together in the pan.
- Prepare the Chicken Coating: In a medium bowl, whisk together the plain flour, 60g cornflour, salt, and white pepper. In a separate shallow bowl, lightly beat the egg.
- Coat the Chicken: Pat the chicken pieces dry with a paper towel. This is a crucial step for a crispy coating! Dip each piece of chicken first into the beaten egg, letting any excess drip off, then dredge it thoroughly in the flour mixture. Place the coated pieces on a plate or baking tray.
- Fry the Chicken: Pour the vegetable oil into a large frying pan or wok until it’s about 2cm deep. Heat over a medium-high heat until it shimmers (around 175°C). Carefully add half of the chicken pieces, ensuring not to overcrowd the pan. Fry for 5-7 minutes, turning occasionally, until golden brown and cooked through. Remove with a slotted spoon and drain on a wire rack. Repeat with the remaining chicken.
- Make the Sauce: In a small jug or bowl, whisk together all the sauce ingredients EXCEPT for the cornflour slurry: the reserved pineapple juice, rice vinegar, brown sugar, ketchup, and soy sauce. Set aside. I find that mixing the sauce while the chicken is frying is the most efficient way to manage time.
- Sauté the Vegetables: Carefully pour out most of the frying oil from the pan, leaving about 1 tablespoon. Return the pan to a medium-high heat. Add the onion and bell peppers and stir-fry for 3-4 minutes until they are slightly softened but still have a bit of a bite.
- Simmer and Thicken Sauce: Pour the prepared sauce mixture into the pan with the vegetables. Bring it to a gentle simmer. Once simmering, slowly whisk in the cornflour slurry. Continue to cook for 1-2 minutes, stirring constantly, until the sauce has thickened to a glossy consistency that coats the back of a spoon.
- Combine and Serve: Add the drained pineapple chunks and the crispy fried chicken to the pan. Gently toss everything together for about 1 minute until the chicken and vegetables are fully coated in the luscious sauce. Serve immediately, garnished with sliced spring onions and toasted sesame seeds.
Tips From My Kitchen
- Temperature Control is Key: For truly crispy chicken, the oil temperature is vital. If it’s too cool, the batter will absorb oil and become greasy. If it’s too hot, the outside will burn before the chicken is cooked. Use a thermometer if you have one, or test the oil by dropping a tiny bit of batter in – it should sizzle vigorously immediately.
- The Secret to Extra Crispiness: I learned that a double fry makes all the difference. Fry the chicken as directed in step 3, then let it rest on the wire rack while you start the sauce. Just before you’re ready to add it to the sauce, return it to the hot oil for a final 60-second fry. This drives out any extra moisture and creates an unbelievably crunchy exterior.
- Make-Ahead Advice: You can make the sauce up to 3 days in advance and store it in an airtight container in the fridge. The vegetables can also be chopped a day ahead. For the best texture, always fry the chicken just before serving.
- Storage: Leftovers can be stored in an airtight container in the refrigerator for up to 3 days. Be aware that the crispy coating will soften upon refrigeration. Reheat in a hot pan or in the oven at 180°C (160°C fan) for 10-15 minutes to help it crisp up again slightly.
Equipment You’ll Need
- Large frying pan or wok
- Sharp knife and cutting board
- Two medium mixing bowls
- Slotted spoon or spider strainer
- Whisk
Common Mistakes to Avoid
- Overcrowding the pan: Frying too many chicken pieces at once will dramatically lower the oil temperature. This causes the chicken to steam rather than fry, resulting in a soggy, oily coating. Always cook in at least two batches to give each piece enough space.
- Not Thickening the Sauce Correctly: Don’t add the cornflour slurry to a cold sauce. It needs to be added to simmering liquid to activate properly. Pour it in slowly while whisking to avoid lumps and ensure a smooth, glossy finish. A watery sauce is a common disappointment, and this step prevents it.
- Adding the Chicken Back Too Early: Wait until the sauce is fully thickened and you’re literally moments from serving before reintroducing the crispy chicken to the pan. The longer it sits in the sauce, the softer the coating will become. A quick toss to coat is all you need.
Delicious Variations to Try
Once you’ve mastered the classic recipe, feel free to get creative. This dish is wonderfully adaptable.
- Spicy Sweet and Sour Chicken: Add 1-2 teaspoons of sriracha or a pinch of dried chilli flakes to the sauce mixture for a welcome kick of heat that cuts through the sweetness.
- Vegetarian/Vegan Option: Swap the chicken for a block of extra-firm tofu. Press the tofu for at least 30 minutes to remove excess water, then cube and coat it in the same batter. Fry until golden and crisp. Ensure your ketchup is vegan-friendly.
- Try it with Pork or Prawns: This recipe works brilliantly with other proteins. Use diced pork loin for a classic sweet and sour pork, or try it with large, peeled king prawns. Just be sure to adjust the cooking time – prawns will only need 2-3 minutes to cook through.
What to Serve With Sweet Sour Chicken
This dish is a fantastic centerpiece for an Asian-inspired meal. Here are a few of my favourite pairings:
- Fluffy Jasmine Rice: Its fragrant aroma and light texture make it the perfect vehicle for soaking up every last drop of that delicious sweet and sour sauce.
- Simple Stir-fried Greens: A side of quickly stir-fried bok choy or tenderstem broccoli with a little garlic and ginger provides a fresh, green contrast to the rich main dish.
- A Refreshing Drink: A crisp, cold lager complements the sweet and tangy flavours perfectly. For a non-alcoholic option, a spicy ginger beer is an excellent choice. And for dessert, something creamy and fruity like my Peach Crumb Cheesecake would be a lovely finish.
Frequently Asked Questions
Sweet Sour Chicken
Ingredients
Method
- Prepare the Chicken Coating: In a medium bowl, whisk together the plain flour, 60g cornflour, salt, and white pepper. In a separate shallow bowl, lightly beat the egg.
- Coat the Chicken: Pat the chicken pieces dry with a paper towel. This is a crucial step for a crispy coating! Dip each piece of chicken first into the beaten egg, letting any excess drip off, then dredge it thoroughly in the flour mixture. Place the coated pieces on a plate or baking tray.
- Fry the Chicken: Pour the vegetable oil into a large frying pan or wok until it's about 2cm deep. Heat over a medium-high heat until it shimmers (around 175°C). Carefully add half of the chicken pieces, ensuring not to overcrowd the pan. Fry for 5-7 minutes, turning occasionally, until golden brown and cooked through. Remove with a slotted spoon and drain on a wire rack. Repeat with the remaining chicken.
- Make the Sauce: In a small jug or bowl, whisk together all the sauce ingredients EXCEPT for the cornflour slurry: the reserved pineapple juice, rice vinegar, brown sugar, ketchup, and soy sauce. Set aside. I find that mixing the sauce while the chicken is frying is the most efficient way to manage time.
- Sauté the Vegetables: Carefully pour out most of the frying oil from the pan, leaving about 1 tablespoon. Return the pan to a medium-high heat. Add the onion and bell peppers and stir-fry for 3-4 minutes until they are slightly softened but still have a bit of a bite.
- Simmer and Thicken Sauce: Pour the prepared sauce mixture into the pan with the vegetables. Bring it to a gentle simmer. Once simmering, slowly whisk in the cornflour slurry. Continue to cook for 1-2 minutes, stirring constantly, until the sauce has thickened to a glossy consistency that coats the back of a spoon.
- Combine and Serve: Add the drained pineapple chunks and the crispy fried chicken to the pan. Gently toss everything together for about 1 minute until the chicken and vegetables are fully coated in the luscious sauce. Serve immediately, garnished with sliced spring onions and toasted sesame seeds.
Notes
I really hope you enjoy making this Sweet and Sour Chicken. It’s one of those recipes that brings so much colour and flavour to the dinner table, and it’s so rewarding to make from scratch. Once you try it, I have a feeling it might become a regular in your meal rotation too. Let me know how you get on in the comments below – I’d love to hear about it!
Happy cooking,
Sophia