Tater Tot Appetizer Cups Recipe Tasty Party Snack
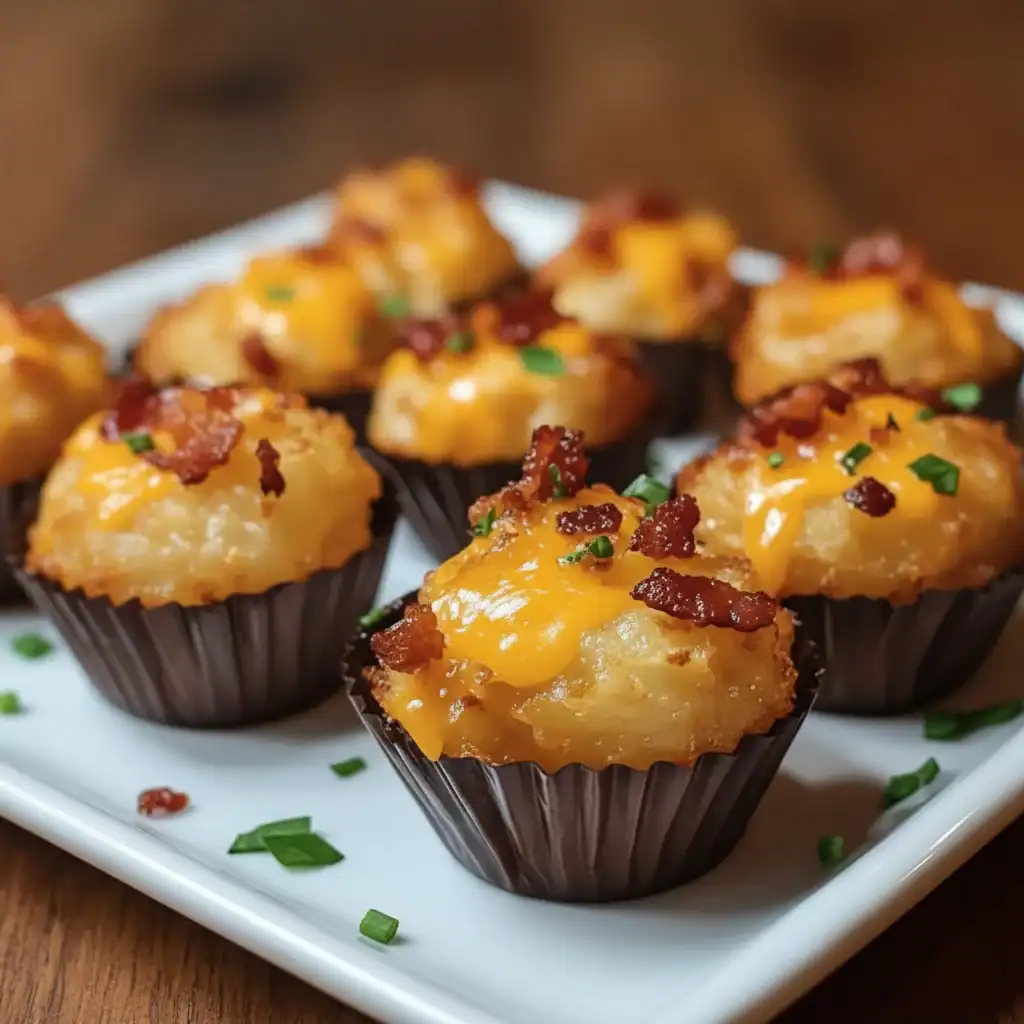
Are you forever searching for that one perfect party appetiser? We know the feeling. It has to be the kind of thing that disappears in a flash, earns rave reviews from your guests, and, crucially, doesn’t keep you cooped up in the kitchen for ages. Well, your search is over. Let us introduce you to these magnificent, golden, and utterly delicious Tater Tot Appetizer Cups. Just picture it: a crisp, savoury potato shell, moulded into a charming little cup, then filled to the brim with salty bacon, molten, gooey cheese, and a touch of creamy sauce. They represent the ultimate handheld comfort food and are a surefire hit that will undoubtedly be the highlight of any gathering, from a relaxed family get-together to a lively party. This isn’t just a snack; it’s a showstopper.
Why You’ll Love This Recipe
- A Symphony of Textures and Flavours: Every single bite offers a wonderful experience, beginning with the satisfying crunch of the potato cup, moving to the savoury burst of bacon, and finishing with the rich, melted cheese blend. It’s pure bliss in one mouthful.
- Incredibly Simple and Speedy: This is the epitome of a low-fuss, high-impact recipe. Using frozen tater tots for the base significantly reduces prep time, making this an ideal choice when you need impressive party food in a hurry.
- Made with Pantry Staples: You won’t need to visit a speciality food shop for this one. The recipe calls for simple, readily available ingredients you probably already have, such as cheese, bacon, and spring onions.
- Fantastically Versatile: Consider this recipe a blank slate for your culinary creativity! The humble tater tot cup serves as the perfect base for an array of wonderful fillings. We’ve got some great suggestions further down to inspire you.
We’ve all had that moment of panic, peering into the fridge just before guests are due, wondering what to make. This Tater Tot Appetizer Cups Recipe is the hero you need. It’s a truly clever method for turning a standard bag of frozen potatoes into a sophisticated and unbelievably tasty snack. The act of shaping the cups is surprisingly satisfying, and the end result is a tray of beautiful, bite-sized delights. They are the very definition of ideal party food—easy to handle while socialising, bursting with familiar, comforting flavours, and a treat for the eyes. And let’s be honest, who could possibly turn down the glorious combination of potato, bacon, and cheese? Certainly not us.
Ingredients
- 700g frozen tater tot potatoes
- 150g streaky bacon, cooked until crisp and crumbled (or bacon lardons)
- 200g mature Cheddar cheese, grated
- 100g Red Leicester cheese, grated
- 120ml soured cream or crème fraîche
- 3 spring onions, finely sliced (plus extra for garnish)
- 1 teaspoon garlic powder
- 1/2 teaspoon onion powder
- 1/4 teaspoon black pepper, freshly ground
- A pinch of salt
- Cooking spray or a little vegetable oil, for greasing
The brilliance of this recipe is found in its straightforwardness. We adore using a mix of cheeses to achieve a richer flavour and a more appealing colour, but you can absolutely use only Cheddar if that’s what you have on hand. A sharp, mature Cheddar provides a lovely tang, whereas the Red Leicester contributes a wonderful creaminess and a beautiful orange glow. Using ready-cooked bacon is a fantastic time-saver, but frying it fresh will fill your home with an amazing aroma, building anticipation for the cheesy, potato goodness that awaits. We urge you not to omit the garlic and onion powders; they introduce a subtle yet deep savoury note that truly lifts these simple appetizer cups from great to unforgettable.
Instructions
- Get the Oven Ready: To begin, preheat your oven to 220°C (200°C Fan / Gas Mark 7). Thoroughly grease a 24-hole mini muffin tin with cooking spray or a bit of oil. This is a vital step to prevent your lovely cups from sticking.
- Create the Tater Tot Base: Place approximately 3-4 frozen tater tots into each section of the mini muffin tin. They should fit snugly. Pop the tin into your hot oven and bake for 10-12 minutes, just until the tots are thawed and beginning to turn a light golden colour.
- Shape the Cups: Carefully take the tin out of the oven. Here comes the enjoyable part! Use the back of a small, oiled spoon or even a shot glass to press down firmly into the centre of the tots in each hole, pushing up the sides to form a distinct cup shape. You’re aiming for a solid potato shell.
- Bake Until Crispy: Place the muffin tin back in the oven to bake for a further 15-20 minutes. You want the cups to become a deep golden brown and wonderfully crisp. A firm, crispy shell is essential for a great tater tot cup, as it stops it from going soft when filled.
- Prepare the Filling: While the cups are in their final baking stage, you can mix together the tasty filling. In a mixing bowl, combine the crumbled bacon, both grated cheese varieties (setting aside a small amount for the topping), the soured cream, sliced spring onions, garlic powder, onion powder, salt, and pepper. Mix it all thoroughly until everything is well incorporated.
- Fill the Cups: After the potato cups are perfectly golden and crisp, take the tin out of the oven. Carefully spoon a good amount of the cheesy bacon mixture into each tater tot cup. Sprinkle the cheese you reserved earlier over the top of each one for an extra-melty finish.
- Final Melt: Return the filled cups to the oven for one last bake of 5-7 minutes. This is just to melt the cheese until it’s bubbly, golden, and looking absolutely irresistible.
- Garnish and Enjoy: Allow the appetizer cups to cool in the tin for a couple of minutes, which helps them to set and makes them easier to handle. Use a small knife to gently lever them out. Transfer them to a serving platter, garnish with some extra sliced spring onions, and serve them up warm to your very happy guests.
Tips and Variations for Success
To ensure your cups are truly sensational, here are a few pointers. Firstly, when you’re pressing the tater tots, be firm; a well-compacted shell will hold its form much more effectively. Secondly, let your imagination run wild with the fillings! You could try a ‘Taco Night’ style with seasoned minced beef, salsa, and a spot of sour cream. How about a ‘Breakfast’ version with crumbled sausage and a little scrambled egg? For those who like a bit of heat, add some finely chopped jalapeños to the classic bacon and cheese mix. A vegetarian option with black beans, sweetcorn, and peppers would also be delicious. The creative potential is limitless.
While these cups are delicious as they are, offering them with a few dipping sauces elevates them to a new level. A classic ranch dressing, a tangy barbecue sauce, or even a simple bowl of extra soured cream would all be fantastic pairings. They are a brilliant addition to a larger party food selection, looking wonderful alongside other favourites like our amazing Bacon Brown Sugar Chicken Tenders or some zesty Bang Bang Chicken Thighs.
Frequently Asked Questions
And there we have it – a wonderfully simple yet impressive recipe that we are sure will become a go-to for all your entertaining needs. These Tater Tot Appetizer Cups tick every box: they are crunchy, cheesy, savoury, and completely addictive. They perfectly fill the space between a casual nibble and a fancy canapé, which makes them suitable for almost any occasion. We can guarantee that after you’ve served a batch of these, you’ll be getting requests for the recipe all evening. So, go on, pick up a bag of tater tots and prepare to create the most talked-about dish at the party. For a sweet treat to follow, why not try our easy and delightful Biscoff Truffles? Enjoy!
Recipe Card

Ingredients
- 700g frozen tater tot potatoes
- 150g streaky bacon, cooked until crisp and crumbled (or bacon lardons)
- 200g mature Cheddar cheese, grated
- 100g Red Leicester cheese, grated
- 120ml soured cream or crème fraîche
- 3 spring onions, finely sliced (plus extra for garnish)
- 1 teaspoon garlic powder
- 1/2 teaspoon onion powder
- 1/4 teaspoon black pepper, freshly ground
- A pinch of salt
- Cooking spray or a little vegetable oil, for greasing
Instructions
- Get the Oven Ready: To begin, preheat your oven to 220°C (200°C Fan / Gas Mark 7). Thoroughly grease a 24-hole mini muffin tin with cooking spray or a bit of oil. This is a vital step to prevent your lovely cups from sticking.
- Create the Tater Tot Base: Place approximately 3-4 frozen tater tots into each section of the mini muffin tin. They should fit snugly. Pop the tin into your hot oven and bake for 10-12 minutes, just until the tots are thawed and beginning to turn a light golden colour.
- Shape the Cups: Carefully take the tin out of the oven. Here comes the enjoyable part! Use the back of a small, oiled spoon or even a shot glass to press down firmly into the centre of the tots in each hole, pushing up the sides to form a distinct cup shape. You’re aiming for a solid potato shell.
- Bake Until Crispy: Place the muffin tin back in the oven to bake for a further 15-20 minutes. You want the cups to become a deep golden brown and wonderfully crisp. A firm, crispy shell is essential for a great tater tot cup, as it stops it from going soft when filled.
- Prepare the Filling: While the cups are in their final baking stage, you can mix together the tasty filling. In a mixing bowl, combine the crumbled bacon, both grated cheese varieties (setting aside a small amount for the topping), the soured cream, sliced spring onions, garlic powder, onion powder, salt, and pepper. Mix it all thoroughly until everything is well incorporated.
- Fill the Cups: After the potato cups are perfectly golden and crisp, take the tin out of the oven. Carefully spoon a good amount of the cheesy bacon mixture into each tater tot cup. Sprinkle the cheese you reserved earlier over the top of each one for an extra-melty finish.
- Final Melt: Return the filled cups to the oven for one last bake of 5-7 minutes. This is just to melt the cheese until it’s bubbly, golden, and looking absolutely irresistible.
- Garnish and Enjoy: Allow the appetizer cups to cool in the tin for a couple of minutes, which helps them to set and makes them easier to handle. Use a small knife to gently lever them out. Transfer them to a serving platter, garnish with some extra sliced spring onions, and serve them up warm to your very happy guests.